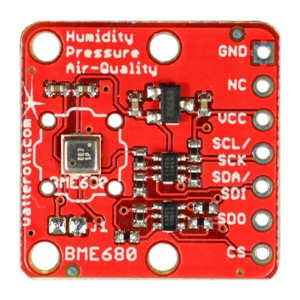
Eric Smith wrote a reply on GoForge - A Renesas FPGA Board. The code is a work in progress; so far, I can read the pressure sensor value, compute a PID output and actuate the valves accordingly, and send & receive sensor values and PID parameters over USB. NEW PRODUCTS: Hazardous Location Line Expands, Improving Your Process With Precision Electro-Pneumatic Control In Any Industry. How Does The James Webb Telescope Phone Home? 05/22/2018 at 15:17. Become a member to follow this project and never miss any updates, About Us This project aims to provide a simple solution for controlling air pressure, in a small package that can be easily integrated into other projects, be they bench-top or mobile. All it took was 5 or 6 hours of work (per piece), a few mistakes, and some cursing. Iassembled a couple more PCBs, and designed a simple enclosure, which I 3D printed in different colors to mark the different range of pressures that each regulator can handle. The 12V supply for the switching valves is connected to the Micro-Controller Board through a designated barrel jack. For the solenoid valves, as alluded to in the project description, I got one proportional valve and one non-proportional (i.e. Eventually, I want the PCB to stack on top of the valves. To make the experience fit your profile, pick a username and tell us what interests you. I was actually able to alleviate the issue somewhat by placing a very small restriction on the vent, which reduces the flow rate out of the vent and thus the pressure drop whenever the vent is opened. Hi! It would vary by ~ 1% of the ADC range. This is a problem not well handled in the market for cost sensitive users. Ichose to go with a 3.3V operating voltage, for easier integration with other microcontrollers over i2c, since basically everything nowadays runs on 3.3V. Be careful not to mix up the cords, as incorrect supply voltages will cause some components to burn out. In the bottom/left of the board are the connectors. The manifoldI wrote about in the last logmeasures 45x45mm. The output of the regulator is hooked up to a pressure gauge, for easy validation. Ulrich wrote a reply on LORA for BRESSER 5 in1 Weather Station (MAKE IOT). Nice project. For many projects that require control of air pressure, the usual option is to hook up a pump, maybe with a motor controller to turn it on and off, and work with that. Ialso thought it would be good to include a simple analog input and output, where the set point and process values are given as voltages. We use one of these pins, Pin 9, to control the regulator. I'd stick with 4-20mA or 0-10 volts. Although the pressure regulator will work just fine if it is assembled like my first prototype (see previous log), Iwant a cleaner, more integrated solution. It runs using a 3D-printed Terminator skull. If ones requirements cant be filled by that level of equipment and control, then its time to look at commercial regulators. Proportion-Air, Inc. manufactures electronic air pressure regulators and air flow control valves. The analog pins are input only, so we need to use the digital pins. Plus, I wanted to learn how to use a mill. Did you find a solution? Here is what it looks like: the bare manifold is on the left; valves and fittings are added, then the PCB is stacked on top: As far as programming goes, this thing is essentially a Sparkfun Pro Micro 3.3V/8MHz. Proportional valves are necessary to smoothly increase the amount of air that is let in (since they can be opened anywhere from 0to 100%), but Ithought Icould get away with a cheaper (35$ vs 70$) valve for the exhaust. Contact Hackaday.io If I can find the list I made last year while researching the same thing I'll share it with you, but I won't be back to work until next Monday at the earliest. They are expensive (~30$/pc) but they are very precise and require no external amplifiers. I'm still learning my way around the pnumatics world, and those two resources will help immensely.And of course, great job with the project and documentation! +1 Protecting The Hughes H4 Hercules With Beach Balls? For me and my fusorwell, I had to create my own, actually fairly similar to this setup, but for far tinier amounts it doesnt take much gas to bring a 10 gallon or so tank up to about 1/100th of a millibar, and to regulate a lot finer than that far less than the initial fill. For example, using digitalWrite(valvePin,!digitalRead(valvePin))instead ofdigitalWrite(valvePin,HIGH)will toggle the valve state on each loop so that you can get alternating actuation. So to counteract that, I average out several successive readings, and also only consider changes of >10/1023 to be an actual change in setpoint.  In concept, about the same thing. By default, the sampling frequency is around 500Hz. Open the Serial Monitor so you can view the flow sensor values. The setup function will only run once after a sketch starts, following each powerup or reset of the Arduino. As an added bonus, it will cost less than half the price of new, commercial regulators. Create an account to leave a comment. For the microcontroller, Ichose an ATMega32u4, since it is Arduino-compatible (the Arduino Leonardo is an ATMega32u4), and it has built-in USB support. To interface with a 5V microcontroller, one would need either a level shifter (for i2c), or a simple voltage divider for the analog set point. bme680 breakout watterott features sensor Since the exhaust only opens every now and then to correct for overshoots and to release pressure when the setpoint is lowered below the current pressure, Ithought a trade-off in precision might be ok. These are pointed downwards, as the board will be stacked above them. electronics circuit components electronic Fascinating, reminds me of my oldie nucleonic ore flow days, pair of Cs137 beta into iron ore curtain horizontal pair of counters measuring mass flow circa 1980s Mt Newman mining. Is this something that only needs a few pressures? First of all, Ihave to speed up the ADC. They are not cheap. 2018 Hackaday Prize Achievement: You've made something previously expensive or rare, affordable & available to all! Again, we use analogRead() to get a value from the flow sensor analog input pin, then scale this raw value to a reading in SLPM units using the calibration formula provided by the sensor manufacturer (read the datasheet for more details). A rotary encoder and LCD makes it easy to change the setpoint and view it and the measured pressure. The first manifold was made by my university's machine shop. And don't hesitate to ask if you have any more questions! Idon't have any experience in designing boards for microcontrollers, so this way I could simply re-use elements of the Arduino Leonardo, Sparkfun Pro Micro, etc. Before someone says mass flow controller I use very approximately .3cc or less at STP per entire run of a pretty expensive gas that one has to satisfy all kinds of regulations to even buy (DEA! Try making it go through its entire range of motion. Turn the potentiometer dial to control the regulator pressure. It starts with a stock piece of aluminum, which is cut on the horizontal bandsaw (not shown) and milled down to size. Be sure to hit "Confirm" on your confirmation email to be added to our list. I haven't thoroughly tested the third one yet but the other two work great.
2018 Hackaday Prize Achievement: You've designed a module that's the definition of interchangeable, easily combined with other projects. Try closing the manual flow valve. I may be able to point one out to you.
The reading on the regulator should change accordingly. This site uses Akismet to reduce spam.
Hackaday Podcast 179: Danger Chess, Corona Motors, An Omni-Walker, And A Fast Talking Telescope, This Week In Security: Symbiote, Smart Locks, And CosmicStrand, Your Own Engineering Workstation, With Mame. I'm looking for an air pressure regulator (~0-12 psi) that I can control with an arduino. 1/8" ID tubing can be bought from McMaster-Carr (assuming you are in the US) or probably anywhere that sells tubing. Built a Mini MIDI controller using an Arduino Pro Micro How to stop servo jiggling? It depends on a lot of things: the level of accuracy required, how low your minimum pressures need to be, whether it needs to exhaust downstream pressure when its setting has changed to a lower value, and what you consider affordable. Autotuning may help eventually, but I think my early problems have more to do with how Ihandle my PID output than how it's calculated. On the software side, Imade use of the Arduino PID library. Had no idea about Pneumadyne. Edit :I really can't calculate.
This function essentially pauses the program for X milliseconds before continuing.
By using these variables, we don't have to update numbers throughout the code every time we change the wiring. The power input is 12V, which supplies both the pressure regulator and the pump on the left. They will end up being a little under 50 x 50 x 50 mm^3, so stacking one on top of another would be useful at least in my application (where they will reside in a box ~130mm tall). Depends on what you want to do with it exactly. Send the time derivative of the input signal also, this way the controller anticipates on fast changing signals since the amplitude of the derivate takes care of this (like sine and cosine). If you continue to use this site we will assume that you are happy with it. Learn more about the MPV used in this Microfluidics Controllerhere. Could this be used to regulate negative air pressure as well as positive? The code for controlling the regulator via the potentiometer is also inside this loop.
Without this correction, the graph looked like this: Still pretty good, but this leads to unnecessary adjusting of the output, which wastes quite a bit of air. You can find the complete bill of materials linked in the article:https://www.sciencedirect.com/science/article/pii/S2468067218301147, Direct link to BOM: https://osf.io/byvmh/. Privacy Policy External sensor and digital control that is. My test setup consisted simply of compressed air on the input, and a pressure gauge on the output. Continuous flow is not in the picture. 157.87 kB - Thank you! I didn't have a Why do parallel circuits always give me trouble? The behavior may be a little counter-intuitive since these solenoid valves are the "normally closed" model, which only open when they are powered. The pressure sensor is a fancy Honeywell model that includes electronics to amplify the signal, and transmit the measured pressure over SPI. For example, to control the amount of suction from a vacuum pump on a pick and place? Monitor the filters and status of an RO unit. Iused a Teensy I had on hand to flash the bootloader via the ICSP header, after which Iwas able to program my board as an Arduino. Create an account to follow your favorite communities and start taking part in conversations. Otherwise, read the brief tutorial below about basic Arduino coding. He found that commercial offerings especially at low pressures tended to leak air, occasionally reported incorrect pressures, and in general just werent very precise. Every component has its own specifications and can withstand different maximum pressures.
Return to Top| Please take a moment and fill out ourfeedback survey, digitalWrite(valvePin,!digitalRead(valvePin)), Copyright 2022 The President and Fellows of Harvard College. In my case, it will be a bunch of solenoid valves connected via small tubes to a microfluidic chip, with mostly-closed channels. License: Creative Commons Attribution Share-alike (https://creativecommons.org/licenses/by-sa/4.0/legalcode), KiCAD schematic.
I will be posting the code on github soon, along with a little demo of the regulator in action. SPI or Analog variants supported. Next is the setup() function, which is required for all Arduino programs. First, we read the analog value from the potentiometer with analogRead(), then use analogWrite() to set the output pin for the regulator to the appropriate control value. For fun I reproduced the microfluidic valve controller of Todd thorsen (https://metafluidics.org/devices/32-channel-controller/) but your design of the microfluidic control system is better and well integrated ! It should also be as small as possible while still leaving space for the two valves, the pressure sensor, and a PCB which will house a microcontroller along with all the components and connectors needed to drive this thing. If you want more frequent updates, reduce the delay time and recompile+reupload the code. Ialso had the campus machine shop make a manifold out of aluminium, which came out perfectly. x-zip-compressed -
The pressure controllers have a resolution of approximately 5000 pressure steps which matches well with the 12 bit DAC on our Arduino board. Therefore, the sealed output here is actually quite close to my intended application, which will consume little to no air.
Proportion-Air products are recognized globally for precise control in a variety of applications and markets learn more. We use them for turning on/off the pressure channels when we need quick delivery of pressure for stop and go applications. For the communication between the pressure regulator and external microcontrollers or computers, Iwanted an i2c interface as well as USB (which would be used both to control the regulator and to program it if necessary).
If all goes well, there should be enough room for the connectors and cables, although it will be a snug fit. and Getting a fast response with no oscillating is difficult, Ithink mostly due to how quickly the pressure changes when the valves are opened even a little bit. They simply report the current pressure over SPI or i2c, or as an analog voltage between 0 and 3.3V or 5V. We typically use the Clippard ET-3M-12VDC valves (with exhaust) to drive PDMS control valves (You can also get an array of valves from Clippard that are connected to a pressure manifold EMC-08-12-XX where XX stands for the kind of valve that you need). After a few hours soldering hunched over a microscope, and some quick programming, I'm happy to say it seems to work so far! I am also trying to lay it out in a way that makes it possible to stack these regulators. For that project, I need precise air pressure levels, and a way to set them using a microcontroller. Try turning the manual flow valve and see the values change. We have always had to take great care to filter air and keep debris out of tiny orifices in the valves in the manifold. You could look into using an Arduino that controls a solenoid along with a metering valve to control flow of that low pressure. Tuning the PID is a bit of a challenge. Ijust added support for analog input & output, i.e. If we want to turn off the valve instead, we would use digitalWrite(valvePin, LOW). Thanks for the suggestion! Positive values open the inlet valve (which is controlled by PWM, so analogWrite(0) closes the valve, analogWrite(512) opens it half-way, and so on). The PCB should fit inside that, minus a couple millimeters on each side to allow space for an enclosure. You are about to report the project "Electronic pressure regulator", please tell us the reason. Iam waiting on more valves to arrive, but here is what it looks like with the one proportional valve Icurrently have: I still have to refine some parts of this design, which will be easier to do once Ihave finished designing the PCB.
AVR has added a new project titled Cyberpunk E-Bike For the Future. There are still considerable spikes though. Log in. open/close) valve.
transistor 2dof cylinder actuator Electrolytes, Theyre What Dehydrated Hackaday Writers Crave! Iwanted Arduino compatibility not only to make programming easier, but also to make the PCB design as easy as possible. The main constraints on the design were the shape of the manifold (square, with two cutouts in opposite corners), the placement of the pressure sensor, and the relatively large number of connectors (for such a small PCB). The design is not finalized yet -- Iwill need to design the PCB first, and make sure that everything will fit as intended -- but here is my current idea for the manifold: The barbed connector on the right is the outlet. The Sandia labs neutristor then up your alley in few respects then re pulse triggering sporadic fusion. setting the setpoint and reading the current pressure via two pins with voltages between 0 and 3.3V. I really enjoy your project !
After a little (manual) tuning, Ihave gotten it to be stable and keep very close to the setpoint, but the response to a change in setpoint is quite slow (up to 2-3 seconds). For the regulator, we need a continuous control signal, unlike the valve which only requires a binary on/off signal. Typically we were using air pressure to drive a piston and generate force to push on something, and had a load cell to sense force and closed the loop around that. There was little dead volume on the output, so opening the vent valve just a little would make the pressure drop very quickly. Inline 15below, we have delay(1000), so the loop will repeat every 1 second. In the course of developing the electronic pressure regulator, he realized it could have applications beyond microfluidics control, and created it as a modular device that can easily be integrated into other systems and handle either positive or negative pressure. We also use them for PDMS valves that were introduced by Quake. AVR wrote a comment on project log New leg design.. A check valve placed between the pump and the inlet valve smooths out the supply somewhat, and holds the pressure downstream even when the pump is turned off. Similar pressure controllers are available for different pressure ranges (0-0.3psi up to 0-150psi). License: Creative Commons Attribution Share-alike (https://creativecommons.org/licenses/by-sa/4.0/legalcode), Proportional solenoid valve. Ihave finished the PCB design and ordered a first batch, so here is a quick update about it. dehipu has added a new log for Fluffbug. Out of frame is a 12V diaphragm pump, which provides the pressurized air (at up to ~25 psi = 1.7 bar). Since our DAC produces 0-5V it is important to chose the correct 0-5V command version. In order to validate the concept, Ibought a pressure sensor and two solenoid valves (see bottom of this post for details). [Craig Watson] did exactly that, but found the results as disappointing as they were expensive. Are you sure you want to remove yourself as The threaded hole on the left face will be plugged; it's just there to make it possible to drill the hole for the top barbed connector. You should As pressure controllers we use theMPV-1-P-FEE015AXL from Proportion-Air in Indiana. So a few weeks ago, I got training on the mills at our makerspace, and started on the process of making my own manifolds. Join our mailing list to receive the latest news and updates from our team. In short, the requirements for the PCB were: Essentially, Iwant a small, integrated package, but still offer as much flexibility as possible with regards to communication with other components, and choice of valves and sensors. Pressure will often swing wildly around the setpoint for a second or two before stabilizing, and there is no good way to reliably get close to the setpoint with this setup. If you were able to get the guide's Blink example to work, you're ready to write and upload your own custom code to control the board hardware. All voltage options (5/12/24 VDC) supported. First, we define some variables to assign and help keep track of what the various pins are connected to. I had bought some commercial pressure regulators, but these turned out to be a disappointment. It turned out great, but professional machining is unnecessarily expensive in this case. After this stage, Ihave a perfectly-sized (to within 50 microns or so) block of aluminum. You'll need a standard regulator to bring down the cylinder pressure, however. To make a long story short, the tiniest lost volume magnetic flap valve I could find over volted so I could operate it faster, using a arduino for command and timing on the inletand a more normal small orifice solenoid valve controlled by the same arduino between the turbo pump and forepump on the outlet, with a high rez a/d on the system pressure sensor Re-open the manual flow valve, and flip the switch(es) to open the solenoid valves, making sure that the corresponding relays are on as well. Set the regulator so that you can feel air coming out of the board's output.
That's a new reading every 20ms, which is way too slow. Ireceived the PCBs and all other components last week. Liftoff of my mini Falcon 9 Rocket! Thanks to Helmut Streyfor allowing us to re-post this blog. The Arduino has 6 pins capable of pulse-width modulation (PWM), which are marked by a ~ next to the pin number. Ive good experience with this in hydraulics and pneumatics (low stiffness due to compressibility of air). They're nickel plated brass (Pneumadyne EB30). based on your interests. Idid end up managing to fit everything onto a 2-layer PCB, cramming components on both sides of the board. If so, I'd set up pressures mechanically and call them with MAC valves.
As it is, the regulator is almost good enough to be used in my experiments, so I may have trouble justifying spending lots of time making it perfect. The board can also control 8 air switching valves. We use cookies to ensure that we give you the best experience on our website. 119.21 kB - The metal block is a custom manifold with valve hardware mounted onto it, and the PCB mounted on top holds the control system. It must be possible to make it with a mill, maybe even just a drill press. Note: Always check the maximum air supply you provide to the system. Basic feedback control can be achieved by utilizing conditional statements with the sensor values. I had a similar need to control pressure in a vacuum tank (deuterium in a fusor), and pretty much all the commercial solutions would be fine for a big lab paying PhDs to sit around and do nothing while they waited speed is money for that crowd those sit-a-rounders arent cheap. This may be a bit more clear with the hidden edges visible: Before Ihad gotten this far, Imade use of our university's makerspace (think[box]) and their fancy 3D printer that can print translucent material, to have a better idea of what the manifold would look like, and weed out any glaring errors.
In concept, about the same thing. By default, the sampling frequency is around 500Hz. Open the Serial Monitor so you can view the flow sensor values. The setup function will only run once after a sketch starts, following each powerup or reset of the Arduino. As an added bonus, it will cost less than half the price of new, commercial regulators. Create an account to leave a comment. For the microcontroller, Ichose an ATMega32u4, since it is Arduino-compatible (the Arduino Leonardo is an ATMega32u4), and it has built-in USB support. To interface with a 5V microcontroller, one would need either a level shifter (for i2c), or a simple voltage divider for the analog set point. bme680 breakout watterott features sensor Since the exhaust only opens every now and then to correct for overshoots and to release pressure when the setpoint is lowered below the current pressure, Ithought a trade-off in precision might be ok. These are pointed downwards, as the board will be stacked above them. electronics circuit components electronic Fascinating, reminds me of my oldie nucleonic ore flow days, pair of Cs137 beta into iron ore curtain horizontal pair of counters measuring mass flow circa 1980s Mt Newman mining. Is this something that only needs a few pressures? First of all, Ihave to speed up the ADC. They are not cheap. 2018 Hackaday Prize Achievement: You've made something previously expensive or rare, affordable & available to all! Again, we use analogRead() to get a value from the flow sensor analog input pin, then scale this raw value to a reading in SLPM units using the calibration formula provided by the sensor manufacturer (read the datasheet for more details). A rotary encoder and LCD makes it easy to change the setpoint and view it and the measured pressure. The first manifold was made by my university's machine shop. And don't hesitate to ask if you have any more questions! Idon't have any experience in designing boards for microcontrollers, so this way I could simply re-use elements of the Arduino Leonardo, Sparkfun Pro Micro, etc. Before someone says mass flow controller I use very approximately .3cc or less at STP per entire run of a pretty expensive gas that one has to satisfy all kinds of regulations to even buy (DEA! Try making it go through its entire range of motion. Turn the potentiometer dial to control the regulator pressure. It starts with a stock piece of aluminum, which is cut on the horizontal bandsaw (not shown) and milled down to size. Be sure to hit "Confirm" on your confirmation email to be added to our list. I haven't thoroughly tested the third one yet but the other two work great. 
2018 Hackaday Prize Achievement: You've designed a module that's the definition of interchangeable, easily combined with other projects.
Try closing the manual flow valve. I may be able to point one out to you. The reading on the regulator should change accordingly. This site uses Akismet to reduce spam.
Hackaday Podcast 179: Danger Chess, Corona Motors, An Omni-Walker, And A Fast Talking Telescope, This Week In Security: Symbiote, Smart Locks, And CosmicStrand, Your Own Engineering Workstation, With Mame. I'm looking for an air pressure regulator (~0-12 psi) that I can control with an arduino. 1/8" ID tubing can be bought from McMaster-Carr (assuming you are in the US) or probably anywhere that sells tubing. Built a Mini MIDI controller using an Arduino Pro Micro How to stop servo jiggling? It depends on a lot of things: the level of accuracy required, how low your minimum pressures need to be, whether it needs to exhaust downstream pressure when its setting has changed to a lower value, and what you consider affordable. Autotuning may help eventually, but I think my early problems have more to do with how Ihandle my PID output than how it's calculated. On the software side, Imade use of the Arduino PID library. Had no idea about Pneumadyne. Edit :I really can't calculate.
This function essentially pauses the program for X milliseconds before continuing.
By using these variables, we don't have to update numbers throughout the code every time we change the wiring. The power input is 12V, which supplies both the pressure regulator and the pump on the left. They will end up being a little under 50 x 50 x 50 mm^3, so stacking one on top of another would be useful at least in my application (where they will reside in a box ~130mm tall). Depends on what you want to do with it exactly. Send the time derivative of the input signal also, this way the controller anticipates on fast changing signals since the amplitude of the derivate takes care of this (like sine and cosine). If you continue to use this site we will assume that you are happy with it. Learn more about the MPV used in this Microfluidics Controllerhere. Could this be used to regulate negative air pressure as well as positive?
The code for controlling the regulator via the potentiometer is also inside this loop. Without this correction, the graph looked like this: Still pretty good, but this leads to unnecessary adjusting of the output, which wastes quite a bit of air. You can find the complete bill of materials linked in the article:https://www.sciencedirect.com/science/article/pii/S2468067218301147, Direct link to BOM: https://osf.io/byvmh/. Privacy Policy External sensor and digital control that is. My test setup consisted simply of compressed air on the input, and a pressure gauge on the output. Continuous flow is not in the picture. 157.87 kB - Thank you! I didn't have a Why do parallel circuits always give me trouble?
The behavior may be a little counter-intuitive since these solenoid valves are the "normally closed" model, which only open when they are powered. The pressure sensor is a fancy Honeywell model that includes electronics to amplify the signal, and transmit the measured pressure over SPI. For example, to control the amount of suction from a vacuum pump on a pick and place? Monitor the filters and status of an RO unit. Iused a Teensy I had on hand to flash the bootloader via the ICSP header, after which Iwas able to program my board as an Arduino. Create an account to follow your favorite communities and start taking part in conversations. Otherwise, read the brief tutorial below about basic Arduino coding. He found that commercial offerings especially at low pressures tended to leak air, occasionally reported incorrect pressures, and in general just werent very precise. Every component has its own specifications and can withstand different maximum pressures. Return to Top| Please take a moment and fill out ourfeedback survey, digitalWrite(valvePin,!digitalRead(valvePin)), Copyright 2022 The President and Fellows of Harvard College. In my case, it will be a bunch of solenoid valves connected via small tubes to a microfluidic chip, with mostly-closed channels. License: Creative Commons Attribution Share-alike (https://creativecommons.org/licenses/by-sa/4.0/legalcode), KiCAD schematic.
I will be posting the code on github soon, along with a little demo of the regulator in action. SPI or Analog variants supported. Next is the setup() function, which is required for all Arduino programs. First, we read the analog value from the potentiometer with analogRead(), then use analogWrite() to set the output pin for the regulator to the appropriate control value. For fun I reproduced the microfluidic valve controller of Todd thorsen (https://metafluidics.org/devices/32-channel-controller/) but your design of the microfluidic control system is better and well integrated ! It should also be as small as possible while still leaving space for the two valves, the pressure sensor, and a PCB which will house a microcontroller along with all the components and connectors needed to drive this thing. If you want more frequent updates, reduce the delay time and recompile+reupload the code. Ialso had the campus machine shop make a manifold out of aluminium, which came out perfectly. x-zip-compressed -
The pressure controllers have a resolution of approximately 5000 pressure steps which matches well with the 12 bit DAC on our Arduino board. Therefore, the sealed output here is actually quite close to my intended application, which will consume little to no air.
Proportion-Air products are recognized globally for precise control in a variety of applications and markets learn more. We use them for turning on/off the pressure channels when we need quick delivery of pressure for stop and go applications. For the communication between the pressure regulator and external microcontrollers or computers, Iwanted an i2c interface as well as USB (which would be used both to control the regulator and to program it if necessary).
If all goes well, there should be enough room for the connectors and cables, although it will be a snug fit. and Getting a fast response with no oscillating is difficult, Ithink mostly due to how quickly the pressure changes when the valves are opened even a little bit. They simply report the current pressure over SPI or i2c, or as an analog voltage between 0 and 3.3V or 5V. We typically use the Clippard ET-3M-12VDC valves (with exhaust) to drive PDMS control valves (You can also get an array of valves from Clippard that are connected to a pressure manifold EMC-08-12-XX where XX stands for the kind of valve that you need). After a few hours soldering hunched over a microscope, and some quick programming, I'm happy to say it seems to work so far! I am also trying to lay it out in a way that makes it possible to stack these regulators. For that project, I need precise air pressure levels, and a way to set them using a microcontroller. Try turning the manual flow valve and see the values change. We have always had to take great care to filter air and keep debris out of tiny orifices in the valves in the manifold. You could look into using an Arduino that controls a solenoid along with a metering valve to control flow of that low pressure. Tuning the PID is a bit of a challenge. Ijust added support for analog input & output, i.e. If we want to turn off the valve instead, we would use digitalWrite(valvePin, LOW). Thanks for the suggestion! Positive values open the inlet valve (which is controlled by PWM, so analogWrite(0) closes the valve, analogWrite(512) opens it half-way, and so on). The PCB should fit inside that, minus a couple millimeters on each side to allow space for an enclosure. You are about to report the project "Electronic pressure regulator", please tell us the reason. Iam waiting on more valves to arrive, but here is what it looks like with the one proportional valve Icurrently have: I still have to refine some parts of this design, which will be easier to do once Ihave finished designing the PCB.
AVR has added a new project titled Cyberpunk E-Bike For the Future. There are still considerable spikes though. Log in. open/close) valve.
transistor 2dof cylinder actuator Electrolytes, Theyre What Dehydrated Hackaday Writers Crave! Iwanted Arduino compatibility not only to make programming easier, but also to make the PCB design as easy as possible. The main constraints on the design were the shape of the manifold (square, with two cutouts in opposite corners), the placement of the pressure sensor, and the relatively large number of connectors (for such a small PCB). The design is not finalized yet -- Iwill need to design the PCB first, and make sure that everything will fit as intended -- but here is my current idea for the manifold: The barbed connector on the right is the outlet. The Sandia labs neutristor then up your alley in few respects then re pulse triggering sporadic fusion. setting the setpoint and reading the current pressure via two pins with voltages between 0 and 3.3V. I really enjoy your project !
After a little (manual) tuning, Ihave gotten it to be stable and keep very close to the setpoint, but the response to a change in setpoint is quite slow (up to 2-3 seconds). For the regulator, we need a continuous control signal, unlike the valve which only requires a binary on/off signal. Typically we were using air pressure to drive a piston and generate force to push on something, and had a load cell to sense force and closed the loop around that. There was little dead volume on the output, so opening the vent valve just a little would make the pressure drop very quickly. Inline 15below, we have delay(1000), so the loop will repeat every 1 second. In the course of developing the electronic pressure regulator, he realized it could have applications beyond microfluidics control, and created it as a modular device that can easily be integrated into other systems and handle either positive or negative pressure. We also use them for PDMS valves that were introduced by Quake. AVR wrote a comment on project log New leg design.. A check valve placed between the pump and the inlet valve smooths out the supply somewhat, and holds the pressure downstream even when the pump is turned off. Similar pressure controllers are available for different pressure ranges (0-0.3psi up to 0-150psi). License: Creative Commons Attribution Share-alike (https://creativecommons.org/licenses/by-sa/4.0/legalcode), Proportional solenoid valve. Ihave finished the PCB design and ordered a first batch, so here is a quick update about it. dehipu has added a new log for Fluffbug. Out of frame is a 12V diaphragm pump, which provides the pressurized air (at up to ~25 psi = 1.7 bar). Since our DAC produces 0-5V it is important to chose the correct 0-5V command version. In order to validate the concept, Ibought a pressure sensor and two solenoid valves (see bottom of this post for details). [Craig Watson] did exactly that, but found the results as disappointing as they were expensive. Are you sure you want to remove yourself as The threaded hole on the left face will be plugged; it's just there to make it possible to drill the hole for the top barbed connector. You should As pressure controllers we use theMPV-1-P-FEE015AXL from Proportion-Air in Indiana. So a few weeks ago, I got training on the mills at our makerspace, and started on the process of making my own manifolds. Join our mailing list to receive the latest news and updates from our team. In short, the requirements for the PCB were: Essentially, Iwant a small, integrated package, but still offer as much flexibility as possible with regards to communication with other components, and choice of valves and sensors. Pressure will often swing wildly around the setpoint for a second or two before stabilizing, and there is no good way to reliably get close to the setpoint with this setup. If you were able to get the guide's Blink example to work, you're ready to write and upload your own custom code to control the board hardware. All voltage options (5/12/24 VDC) supported. First, we define some variables to assign and help keep track of what the various pins are connected to. I had bought some commercial pressure regulators, but these turned out to be a disappointment. It turned out great, but professional machining is unnecessarily expensive in this case. After this stage, Ihave a perfectly-sized (to within 50 microns or so) block of aluminum. You'll need a standard regulator to bring down the cylinder pressure, however. To make a long story short, the tiniest lost volume magnetic flap valve I could find over volted so I could operate it faster, using a arduino for command and timing on the inletand a more normal small orifice solenoid valve controlled by the same arduino between the turbo pump and forepump on the outlet, with a high rez a/d on the system pressure sensor Re-open the manual flow valve, and flip the switch(es) to open the solenoid valves, making sure that the corresponding relays are on as well. Set the regulator so that you can feel air coming out of the board's output.
That's a new reading every 20ms, which is way too slow. Ireceived the PCBs and all other components last week. Liftoff of my mini Falcon 9 Rocket! Thanks to Helmut Streyfor allowing us to re-post this blog. The Arduino has 6 pins capable of pulse-width modulation (PWM), which are marked by a ~ next to the pin number. Ive good experience with this in hydraulics and pneumatics (low stiffness due to compressibility of air). They're nickel plated brass (Pneumadyne EB30). based on your interests. Idid end up managing to fit everything onto a 2-layer PCB, cramming components on both sides of the board. If so, I'd set up pressures mechanically and call them with MAC valves.
As it is, the regulator is almost good enough to be used in my experiments, so I may have trouble justifying spending lots of time making it perfect. The board can also control 8 air switching valves. We use cookies to ensure that we give you the best experience on our website. 119.21 kB - The metal block is a custom manifold with valve hardware mounted onto it, and the PCB mounted on top holds the control system. It must be possible to make it with a mill, maybe even just a drill press. Note: Always check the maximum air supply you provide to the system. Basic feedback control can be achieved by utilizing conditional statements with the sensor values. I had a similar need to control pressure in a vacuum tank (deuterium in a fusor), and pretty much all the commercial solutions would be fine for a big lab paying PhDs to sit around and do nothing while they waited speed is money for that crowd those sit-a-rounders arent cheap. This may be a bit more clear with the hidden edges visible: Before Ihad gotten this far, Imade use of our university's makerspace (think[box]) and their fancy 3D printer that can print translucent material, to have a better idea of what the manifold would look like, and weed out any glaring errors.