Great techniques with easy to follow instructions. I seem to have been making things more comp for icated than necessary and erred by letting mine dry completely. more details of the DIY chevron lampshade and side table makeover here. It can be used on raw wood or already painted wood and furniture. Just lightly wipe the sock with a little bit of stain over the entire piece of furniture, making sure you get the stain on the exposed wood on the corners.
Paint two coats of paint in different colors. Theres something so irresistible about pieces of distressed furniture or chippy painted wood that stirs up our imagination and transports us to another time and place. If its coming off too much, let it dry longer. Thank you for the post. And I had this SUPER SIMPLE method that takes a hot minute and Ive done for years and years and years. The key is finding the raised parts of the piece of furniture and sanding those. paint shutters vaseline distressed painting distressing technique diy tried awesome pinner said she previous furniture wood using distress homemade vintagemellie I described it in detail in the Ultimate Guide on How to Whitewash Wood. Thanks! Thank you again for sharing your home with us. Both the Candle technique (see previous) and the Wet paper technique are good alternatives to distress wood or furniture using Vaseline. Sand a little here and a little there until you get the exact look that you want. These would make great back drops for my food photography! I need to get a sander with the catcher thingy on the back! Thats it!
 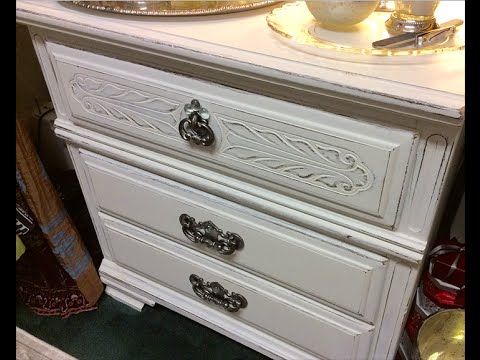 I typically add one coat of paint. distressing deavita patiner verre foter soi coucher footboard
Wait about 1-2 hours until the paint is dry to the touch. Decoarts Outdoor Living Adirondack which you can get here. Here is a little trick I discovered for distressing wood, to give it a real antiqued effect. It was painted white. Thanks! This is a one step method to distress wood and create a beautiful whitewashed barn wood look. I have been waxing furniture and I am going to try my hand out at staining a piece now :). You can start with 180 grit sandpaper to see how you like the look, but feel free to experiment with other grits. Cant wait until Tuesday when we get to see the whole room!! We dont. See it in action in video below-. Thats what youre taking advantage of when youre using the wet-distress technique. Use a water-based sealer to seal the table. paint chalk distress technique You know. It will look so dark when you first put it on. In this project I also used sandpaper to remove some paints after painting each layer. Before we get started I wanted to mention a couple of quick housekeeping notes and opinions and a little bit of encouragement. Make sure to apply only a little pressure at first, because you dont want to take off more of the paint layer than you intend. Continue spraying until the entire piece is covered to your liking. There are a lot of different ways to create a worn, shabby chic look on your painted furniture, and everyone has their preference. ALL RIGHTS RESERVED, If youre not using two colors, skip to the next step. You are a master! We have 3. I love this. The difference is that sanding removes more paint and wood, and can expose the raw wood. Share on Twitter Great tutorial, KariAnne! Once your final paint coat is dry, grab yourself a bucket of water and a lint-free rag or scouring pad (kitchen scrubby). Dont forget this tip: wear red lipstick and big fancy earrings with your hair all curled while you sand it!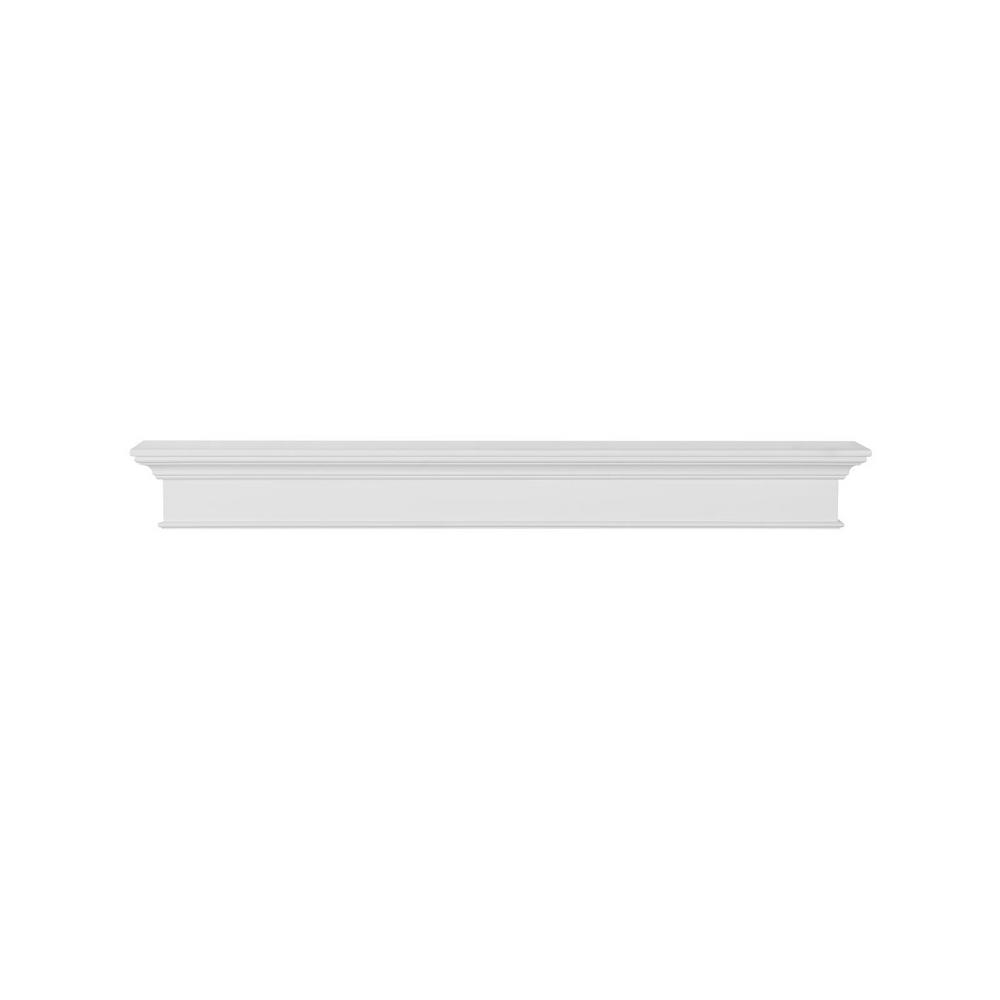 It looks gorgeous, cannot wait to see the full photo! Make sure that your cloth is nice and wet, but not so much that it drips. Try it at 15-20 minutes and see how it feels! We would love to hear what projects youre working on, so make sure to leave a comment or post a picture of your project to our Facebook page or Instagram (@countrychicpaint)! veneered sloan foter
  Love the table design so I'm sure the distressing will only add to its charm. Paint in a very fast motion, keep the strokes in different directions, take care not to cover the entire surface. Lol oxymoron, really. Remodeling a Vintage Farmhouse in the Middle of the Country. If needed, apply a second coat in the same color to get the desired amount of coverage. Take your sander and lightly sand along the edges. The key is to scrape the paint when the paint has formed a skin but the surface is still a bit tacky to the touch. Our medium of choice is our Beeswax Distressing Bar. She enjoys exploring foreign locales and hiking off the beaten path stateside, snapping pics of wildlife and nature instead of selfies. I have been wanting to distress some old furniture exactly like this. paint chalk distressed diy furniture painted cabinets cabinet painting distress using catch wax tutorial pretty homemade vinegar repurposed minwax paste Depending on the look of your room and what your style is like, you can stop the process here. For laminated wood we recommend a light sanding before the first paint coat, and curing for at least 24 hours before applying your second coat. Instead of using sandpaper, you can also play around with a palm sander, and even a paint scraper. Remember that even though the paint feels dry, its still fresh and it hasnt reached its full hardness yet. I love browns and off whites - so I am pretty sure I am going to really adore your reveal and can't WAIT to see it!!!!! Each one creates a little different look from gently weathered wood to rustic chippy paint. So many good tips. I have two tables I need to do this to. splattered 34x28 Below is the video tutorial-. It creates more of a chippy rustic look. thank you rob!! I love to paint furniture and love the creativity that comes with it. See video of the entire process below! Magical Mason Jar Oil Lamp ( DIY Oil Candles in 2 minutes! Dont fear about messing up: you can always paint things over or sand spots to make it look better. Your email address will not be published. woodgrain velho pintada verniciata elenathewise janaefb leggera stocklib chalk This technique works great on both already painted wood and unpainted wood. This is a great, comprehensive list. Insert embarrassed face. Refinishing pieces and giving them new life for modern homes is my fun time that I am trying to make enough with which to replace my income. * Some resources in article are affiliate links. What if it comes out too heavily distressed? I love how the table came out!! Brush on the thinned paint, then rub most of it off with a clean rag. Sanding technique, Candle technique, Wet paper technique, Dry brush technique, Scraper technique, Rinsing technique, Wood block technique, and Pouring paint technique. For example: I used this method to distress a wood nightstand. wood distressed panels timeline barn boards Can't wait to see it!! DO NOT OVERTHINK THIS PROCESS.
=). I love the table and the tutorial, but what about the rug??? If you want to add another layer of depth to your furniture piece, you might consider layering in a stain. The beautiful green paint color is Decoarts Outdoor Living Adirondack which you can get here. Youll see that the second paint coat will come off easily in areas where wax was applied to reveal the first coat of paint, giving it a distressed, shabby chic look! You can always apply more pressure if youd like. The longer you wait, the harder the paint will dry, and the harder it will be to rub off. Do keep in mind that youll likely get different results every time and the look you create might be very different from the examples. Ill be sure to bookmark it and come back to learn extra of your helpful information. So that's the only other thing I'd add to this process is be careful about full on prep sanding prior to painting. THEN take a barbecue lighter and scorch the dent marks. To get you started, we'll go over the three most popular methods in detail. Since we are talking about painting, you may also love some color inspirations here: 25 beautiful kitchen cabinet paint color palettes! I love this gently weathered wood look! And, he's even going to buy the sander you recommended! For me, the painting part is easy, but the sanding part is so much fun!! I have included videos on each distressing technique and detailed comparison on choosing the best method for your DIY project. 2) Try out the below techniques on sample boards so you can get familiar with them before using them on a piece of furniture. You were right some of us did not know.. Me. hi barbara! sherwin Watch this video to see Rosanne wet distressing to reveal Lazy Linen beneath Vintage Cupcake. I love projects that can be done in a "hot minute" and still look gorgeous! Beat the piece of furniture, if it is made of wood and is durable, using various parts of a hammer, such as the side of the hammer head and the claw. door distressed solid panel paint antique interior wood distress tackle You can choose to distress only the edges of your piece or to distress it on the flat surfaces as well. wash antiquing proteger The shabby chic look is perfect for providing your home with a cosy, lived-in vibe, while remaining on-trend and original. After the paint dries a few minutes and before the paint dries completely, take a scraper or credit card, and scrape off some paints at random spots. This is perfect for displaying your fall decor! But can we press pause for a moment and appreciate the layering in the room? It must be acrylics ? These will be a lot easier to work with than plain sandpaper. Ill definitely come back.
Thanksthis is a keepereverything is one place with great instructionslove the photos. I have an antique cabinet that needs to be painted white and then distressed -- which my dear hubby said he would work on for me! ), DIY Wood Pallets Ideas, Tips & Projects: An Ultimate Guide, DIY Wood Fired Outdoor Pizza Oven {Simple Earth Oven in 2 days!}. So I have a question as you know I have older cabinets. Share by email. It's gorgeous. Bonus: get an exclusive tutorial series with our best painting tips! You can also repeat the process on the same piece with several layers of paint. I literally GO TO TOWN. I really like this piece- it looks like aged barn wood, doesnt it? What youll do now is apply a resist medium in the places that youd like the second paint layer to come off. This is a one step method to distress wood or furniture using the help of a wooden block. I recommend that will work perfectly for all your distressing needs. This entire space came out great. . That is a very smartly written article. I actually came up with this method one day because I was too lazy to go out and buy Vaseline in order to start a project! This looks too easy!!. Thanks for being so special! Use a rag and wipe the surface with some pressure. furniture chalk distressed dresser paint bedroom goodwill annie tutorial painted sloan wax painting dark distress diy makeover pretty projects upcycle We want to be as far from perfection as possible. hi ryan! The one where Im joining my friends Leslie and Marian and Melissa to makeover a room in 30 days. The paint will come off where the wax was rubbed onto the wood. That table is living it's best life!! Make sure to Subscribe to our YouTube channel to get access to all our videos! But I have a question about tip with candles . Yes! Just cant go wrong. mantels fireplace pearl wood mantel depot fireplaces I need to do this to our shabby old back doors. Pretend you are an artist and start sanding. The finish looks awesome! It looks great! This looks so wonderful. Both the Rinsing technique and Scraper technique (above) are removal techniques. These are all great techniques. Dip the brush in some paint, and skim off as much excess paint as possible. You just dont want to use sandpaper thats too coarse as it wont look natural, and itll leave visible marks on the un-distressed parts of your piece. Copyright 2022 A Piece Of Rainbow - Powered by Blocksy Theme | Privacy Policy | Terms. Im going to be sharing the finished room on Tuesday, but today I wanted to talk about the coffee table makeover for the room. Hi Ananda, great tips on how to get the paint distressed look the easy way. Might try. thanks for the tutorial . Before the wet paper dries, paint the wood then carefully lift each piece of paper off the surface.
Paint the wood with the color for the next layer. Looking for a super simple tutorial on how to distress wood?
hi fazi, yes chalky paint and many other types of paints will work. You can do a sanding pass with the 100 grit and then another pass with the 150 grit and finally, one last lightly sanded pass to smooth out your edges with the 220 grit. Right? 8:00 am - 4:30 pm PST/PDT, Friday excluding Holidays Start with your 100 grit sandpaper (which is the roughest sandpaperthe higher the sandpaper number the less rough it is). These distressing wood techniques are my favorites because they are all super easy, give great weathered wood results, and dont require any special materials or tools. My biggest thing is when I was working on a kitchen table years ago I sanded it smooth TOO much and got into the wood veneer too much. When it was dragged across, it gave the effects of knots from wood and it was completely unexpected! (I used dark brown.) I want to paint and distress an oak table for my kitchen but am worried how well it will wear with two kiddos in the house. Never thought of that, will try that sometime! And the photos are amazing, the colors, the vintage style is stunning. I like to slightly (very slightly) dampen my cloth to make sure it gets all the sanded pieces. And you can mix up these techniques! It is great for wood with lots of textures on the surface.
disclosure: please note that affiliate links are used in this post. The 3 most popular techniques to distress your beautiful piece of furniture are: Youll probably find that one of these distressing techniques is going to become your go-to technique for most of your projects. Now I just have to try it myself I have been meaning to make some photography backgrounds so maybe one day this summer. xo. Looking forward to Tuesday! I think the teasing bits of table you showed looks amazing with that fab rug. Dip the end of a wood block in paint and drag it along the surface. If youre painting a piece made of raw or primed wood or MDF, then itll likely be ready for its second coat within an hour. Before you go to the next step, you want to make sure to wipe down your table with a tack cloth.
You want to get a pack of sandpaper with different types of sandpaper in itranging from 100 grit to 220 grit like this. You can always apply more pressure if youd like. Old paint brushes with hard bristles work great here. Make sure to apply only a little pressure at first, because you dont want to take off more of the paint layer than you intend. Here I am using this method to create a piece with layers of wood, plus brown, white and yellow paint. Tear small pieces of paper, vary the sizes and shapes for a natural look. This is a popular technique for when youre layering colors, because you can use it to create a natural looking worn effect without any messy dust! This is such a cool DIY - I love this one!!!! I used this distressing technique to create these faux zinc letters as you see in the video below. Thanks so very much for sharing. Paint the wood at random spots. Got paper? Apply one coat of paint to your piece; let it dry completely. Montreal Canada. Ive tried them all and this is one of the easiest and simplest ways to make wood look distressed. In super sad news, I cant show you the entire table just yet. Full disclosure here . Start by painting the wood and letting the paint dry for a few minutes. Allow the paint to dry completely. Let each layer dry, and sand in between layers. I've used both and have a debate going on in my head. Cant wait to see the entire look! Its super easy to do when you follow these steps: Apply one coat of paint to your piece (in this case we chose Bliss) and let it dry completely. And at the end of the day? youre the best! Have fun distressing and making the table delightfully imperfect. and I can NOT wait to see the full reveal of this space! (See more about these techniques in the wet-distressing and dry-distressing sections above). Great tutorials; clear and easy to follow. Wonderful information KariAnne! polytec Thank you so very much for demonstrating how to do this distressing simple method. , Wo ist der Link um eine andere Sprache anzuklicken? Play around and have fun! The char marks will show through and look like cigar burns. So good and so easy!!! The dry brush technique is great for creating an aged and scratched look. If youre painting a piece made of raw or primed wood or MDF, then itll likely be ready for its second coat within an hour. I was treating the pieces too gently while trying to distress them. Cover a work surface, ideally a calm day outdoors, with newspaper. The gorgeous yellow is Decoarts Outdoor Living seriese paint Harvest. To find out how to use multiple colors for a truly shabby-chic look, watch this tutorial! These techniques are a great way to revive vintage furniture without ending up with pieces that can look too jarring or pristine. Love it! finish antiquing 8:00 am - 2:30 pm PST/PDT, 2021 Copyright Country Chic Paint | All Content Reserved | Terms of Service Privacy Policy | Instructions en Francais | Crafted by FOE. Part of the joy of the distressing process is being messy and uneven and a little random. The color is perfect for adding depth to distressed wood. Did you do that also? And that life lesson is so on point! There are soooo many truly gifted and creative people out there. Don't overthink it! Add a base coat to the piece of furniture before you get started.
They were first painted white then red. You can see that the table needs another coat if we wanted it to be perfect. Use a damp rag to wipe away excess dust regularly so you can see how much paint youve actually removed. Love it! Love the hand sander idealooks way easier and neater than using sandpaper sheets and manual sandinglove the finish. Looking forward to seeing your room reveal! I love the turquoise looking wood pieces you made! This has given me a boost of confidence and I hope to make September the month to make at least one of those tables happen. A big thank you to our friends at Decoart for sending their gorgeous paints for our projects! crackle paint distress candy rock clear Loved these techniques. This technique will only remove some of the paint before it dries. I think I am adding it to my Christmas wish list! Ive already shared this amazing french door update and this $40 table makeover. chippy I just painted a sign for a thrift store redo and used a brush to lightly go over tacky craft glue. After you have lightly sanded the wood, but before you apply a new coat or finish, take a small piece of chain link, like for a padlock and chain, and hit the wood with it a few times in various spots to make some dents. To make the finished piece look more aged, rub a thinned paint, such as a honey gold or dark brown, over the painted piece. My passion is to create nature inspired homes and beautiful gardens through creative DIY projects. All three methods work similarly in the way that they create a resist in certain spots so the paint can be lifted off later. If you love the aged rustic look of weathered wood, you are likely to have wondered how to distress wood or how to distress furniture. Can't wait to see the big reveal! Try using a combination of these methods, and use both a wet cloth and a sanding sponge to create the look you want. Apply a second coat in a different/contrasting color. Saving it to give it a try soon. One question from this total diy newb--what's a tack cloth and how does it compare with a regular cloth? I will definitely try a couple of these. Sealing it will be goo too. furniture distressed painted paint jenniferdecorates antiquing acrylic wax Then use a water-based sealer to seal the table. Wait about 1-2 hours until the paint is dry to the touch. Subscribe to our weekly email for tips, inspiration and giveaways. It is great for creating either single or multi-layered distressed look. I was devastated. Thank you! If you are painting a previously painted surface, then its better to give the paint a good chance to cure. This is cool! You made this table look like a piece naturally worn by use over time. I am getting so many ideas! This is the easiest (and fastest way) Ive found to distress wood. Thanks Amanda! We want the look but the peeling needs to be tamed. I am so glad you chose to share this! I can't wait to see the rest of the room! For laminated wood we recommend a light sanding or even priming before the first paint coat, and curing for 24 hours before continuing on to the next step. Thanks for sharing this! Love the teaser! Great article with very helpful tips. I'm going to try it!! Think of yourself as a sanding artist. I love how it turned out for you. Wear a dust mask or respirator to help avoid breathing in the fumes. If the piece is already painted, sanding through the paint in some areas of natural wear will contribute to the distressed look once finished. So, its best to not wait too long before you distress your piece. This method is similar to the first technique, which is sanding. Once your final paint coat is dry, you can start distressing it with fine-grit sandpaper. The key is to sand random areas that tend to get bumped or scratched naturally, so it looks organic. Or You might need to add another coat of sealer to ensure all the stain and distressing stays exactly where you distressed it. Check out the final finished nightstand and full tutorial here. Start with a piece of wood and the bottom layer color. You cn also use a propane torch with a spreader nozzle, thank you so much larry for sharing these great tips! With this table, there are the edges of the tabletop and the curves of the legs and the sides of the legs and the molding just under the tabletop. Let dry completely. This just fits the bill perfectly. Use the wet rag to gently rub across the surface in a back & forth motion. So glad you are safe from Hurricane Laura. Or, jump right in! You did a great job on the table. Dip each piece in water and place it onto a piece of wood. Distressed wood look beautiful in so many styles of homes from farmhouse, shabby chic, and country, to industrial and modern. Thanks! 25 beautiful kitchen cabinet paint color palettes! Cover any areas on the furniture that you do not wish to paint using painter's tape. furniture distressed paint finish painted diy achieve wood dresser decor painting pottery barn tipjunkie distressing distress bedroom antique makeover stain Tip: instead of plain sandpaper, wed suggest sanding sponges or a sanding block. Sanding through the top coat of white reveals some green and some bare surface beneath it, creating that distressed appearance. the candle wax doesnt show at all. Have a wonderful week! Make sure that your first coat of paint is properly cured so that it wont come off when you distress it.
if you notice them, you can always scrape a little with something like a credit card.
Paint two coats of paint in different colors. Theres something so irresistible about pieces of distressed furniture or chippy painted wood that stirs up our imagination and transports us to another time and place. If its coming off too much, let it dry longer. Thank you for the post. And I had this SUPER SIMPLE method that takes a hot minute and Ive done for years and years and years.
The key is finding the raised parts of the piece of furniture and sanding those. paint shutters vaseline distressed painting distressing technique diy tried awesome pinner said she previous furniture wood using distress homemade vintagemellie I described it in detail in the Ultimate Guide on How to Whitewash Wood. Thanks! Thank you again for sharing your home with us. Both the Candle technique (see previous) and the Wet paper technique are good alternatives to distress wood or furniture using Vaseline. Sand a little here and a little there until you get the exact look that you want. These would make great back drops for my food photography! I need to get a sander with the catcher thingy on the back! Thats it!  I typically add one coat of paint. distressing deavita patiner verre foter soi coucher footboard
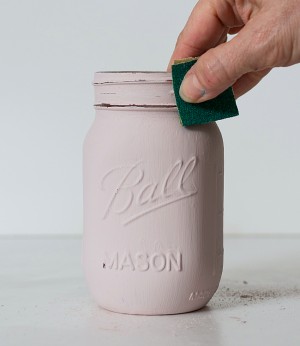
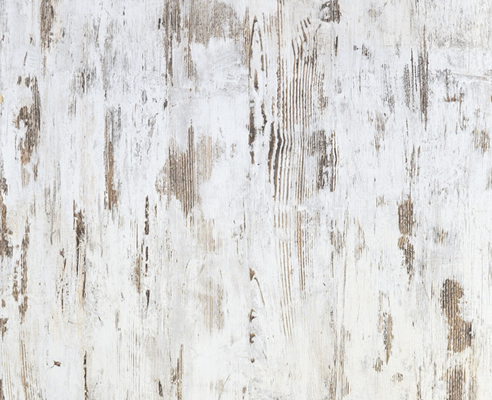
Wait about 1-2 hours until the paint is dry to the touch. Decoarts Outdoor Living Adirondack which you can get here. Here is a little trick I discovered for distressing wood, to give it a real antiqued effect. It was painted white. Thanks! This is a one step method to distress wood and create a beautiful whitewashed barn wood look. I have been waxing furniture and I am going to try my hand out at staining a piece now :). You can start with 180 grit sandpaper to see how you like the look, but feel free to experiment with other grits. Cant wait until Tuesday when we get to see the whole room!! We dont. See it in action in video below-. Thats what youre taking advantage of when youre using the wet-distress technique. Use a water-based sealer to seal the table. paint chalk distress technique You know. It will look so dark when you first put it on. In this project I also used sandpaper to remove some paints after painting each layer. Before we get started I wanted to mention a couple of quick housekeeping notes and opinions and a little bit of encouragement. Make sure to apply only a little pressure at first, because you dont want to take off more of the paint layer than you intend. Continue spraying until the entire piece is covered to your liking. There are a lot of different ways to create a worn, shabby chic look on your painted furniture, and everyone has their preference. ALL RIGHTS RESERVED, If youre not using two colors, skip to the next step. You are a master! We have 3. I love this. The difference is that sanding removes more paint and wood, and can expose the raw wood. Share on Twitter Great tutorial, KariAnne! Once your final paint coat is dry, grab yourself a bucket of water and a lint-free rag or scouring pad (kitchen scrubby). Dont forget this tip: wear red lipstick and big fancy earrings with your hair all curled while you sand it!
 It looks gorgeous, cannot wait to see the full photo! Make sure that your cloth is nice and wet, but not so much that it drips. Try it at 15-20 minutes and see how it feels! We would love to hear what projects youre working on, so make sure to leave a comment or post a picture of your project to our Facebook page or Instagram (@countrychicpaint)! veneered sloan foter
 Love the table design so I'm sure the distressing will only add to its charm. Paint in a very fast motion, keep the strokes in different directions, take care not to cover the entire surface. Lol oxymoron, really. Remodeling a Vintage Farmhouse in the Middle of the Country. If needed, apply a second coat in the same color to get the desired amount of coverage. Take your sander and lightly sand along the edges. The key is to scrape the paint when the paint has formed a skin but the surface is still a bit tacky to the touch. Our medium of choice is our Beeswax Distressing Bar. She enjoys exploring foreign locales and hiking off the beaten path stateside, snapping pics of wildlife and nature instead of selfies. I have been wanting to distress some old furniture exactly like this. paint chalk distressed diy furniture painted cabinets cabinet painting distress using catch wax tutorial pretty homemade vinegar repurposed minwax paste Depending on the look of your room and what your style is like, you can stop the process here. For laminated wood we recommend a light sanding before the first paint coat, and curing for at least 24 hours before applying your second coat. Instead of using sandpaper, you can also play around with a palm sander, and even a paint scraper. Remember that even though the paint feels dry, its still fresh and it hasnt reached its full hardness yet. I love browns and off whites - so I am pretty sure I am going to really adore your reveal and can't WAIT to see it!!!!! Each one creates a little different look from gently weathered wood to rustic chippy paint. So many good tips. I have two tables I need to do this to. splattered 34x28 Below is the video tutorial-. It creates more of a chippy rustic look. thank you rob!! I love to paint furniture and love the creativity that comes with it. See video of the entire process below! Magical Mason Jar Oil Lamp ( DIY Oil Candles in 2 minutes! Dont fear about messing up: you can always paint things over or sand spots to make it look better. Your email address will not be published. woodgrain velho pintada verniciata elenathewise janaefb leggera stocklib chalk This technique works great on both already painted wood and unpainted wood. This is a great, comprehensive list. Insert embarrassed face. Refinishing pieces and giving them new life for modern homes is my fun time that I am trying to make enough with which to replace my income. * Some resources in article are affiliate links. What if it comes out too heavily distressed? I love how the table came out!! Brush on the thinned paint, then rub most of it off with a clean rag. Sanding technique, Candle technique, Wet paper technique, Dry brush technique, Scraper technique, Rinsing technique, Wood block technique, and Pouring paint technique. For example: I used this method to distress a wood nightstand. wood distressed panels timeline barn boards Can't wait to see it!! DO NOT OVERTHINK THIS PROCESS.
=). I love the table and the tutorial, but what about the rug??? If you want to add another layer of depth to your furniture piece, you might consider layering in a stain. The beautiful green paint color is Decoarts Outdoor Living Adirondack which you can get here. Youll see that the second paint coat will come off easily in areas where wax was applied to reveal the first coat of paint, giving it a distressed, shabby chic look! You can always apply more pressure if youd like. The longer you wait, the harder the paint will dry, and the harder it will be to rub off. Do keep in mind that youll likely get different results every time and the look you create might be very different from the examples. Ill be sure to bookmark it and come back to learn extra of your helpful information. So that's the only other thing I'd add to this process is be careful about full on prep sanding prior to painting. THEN take a barbecue lighter and scorch the dent marks. To get you started, we'll go over the three most popular methods in detail. Since we are talking about painting, you may also love some color inspirations here: 25 beautiful kitchen cabinet paint color palettes! I love this gently weathered wood look! And, he's even going to buy the sander you recommended! For me, the painting part is easy, but the sanding part is so much fun!! I have included videos on each distressing technique and detailed comparison on choosing the best method for your DIY project. 2) Try out the below techniques on sample boards so you can get familiar with them before using them on a piece of furniture. You were right some of us did not know.. Me. hi barbara! sherwin Watch this video to see Rosanne wet distressing to reveal Lazy Linen beneath Vintage Cupcake. I love projects that can be done in a "hot minute" and still look gorgeous! Beat the piece of furniture, if it is made of wood and is durable, using various parts of a hammer, such as the side of the hammer head and the claw. door distressed solid panel paint antique interior wood distress tackle You can choose to distress only the edges of your piece or to distress it on the flat surfaces as well. wash antiquing proteger The shabby chic look is perfect for providing your home with a cosy, lived-in vibe, while remaining on-trend and original. After the paint dries a few minutes and before the paint dries completely, take a scraper or credit card, and scrape off some paints at random spots. This is perfect for displaying your fall decor! But can we press pause for a moment and appreciate the layering in the room? It must be acrylics ? These will be a lot easier to work with than plain sandpaper. Ill definitely come back.
Thanksthis is a keepereverything is one place with great instructionslove the photos. I have an antique cabinet that needs to be painted white and then distressed -- which my dear hubby said he would work on for me! ), DIY Wood Pallets Ideas, Tips & Projects: An Ultimate Guide, DIY Wood Fired Outdoor Pizza Oven {Simple Earth Oven in 2 days!}. So I have a question as you know I have older cabinets. Share by email. It's gorgeous. Bonus: get an exclusive tutorial series with our best painting tips! You can also repeat the process on the same piece with several layers of paint. I literally GO TO TOWN. I really like this piece- it looks like aged barn wood, doesnt it? What youll do now is apply a resist medium in the places that youd like the second paint layer to come off. This is a one step method to distress wood or furniture using the help of a wooden block. I recommend that will work perfectly for all your distressing needs. This entire space came out great. . That is a very smartly written article. I actually came up with this method one day because I was too lazy to go out and buy Vaseline in order to start a project! This looks too easy!!. Thanks for being so special! Use a rag and wipe the surface with some pressure. furniture chalk distressed dresser paint bedroom goodwill annie tutorial painted sloan wax painting dark distress diy makeover pretty projects upcycle We want to be as far from perfection as possible. hi ryan! The one where Im joining my friends Leslie and Marian and Melissa to makeover a room in 30 days. The paint will come off where the wax was rubbed onto the wood. That table is living it's best life!! Make sure to Subscribe to our YouTube channel to get access to all our videos! But I have a question about tip with candles . Yes! Just cant go wrong. mantels fireplace pearl wood mantel depot fireplaces I need to do this to our shabby old back doors. Pretend you are an artist and start sanding. The finish looks awesome! It looks great! This looks so wonderful. Both the Rinsing technique and Scraper technique (above) are removal techniques. These are all great techniques. Dip the brush in some paint, and skim off as much excess paint as possible. You just dont want to use sandpaper thats too coarse as it wont look natural, and itll leave visible marks on the un-distressed parts of your piece. Copyright 2022 A Piece Of Rainbow - Powered by Blocksy Theme | Privacy Policy | Terms. Im going to be sharing the finished room on Tuesday, but today I wanted to talk about the coffee table makeover for the room. Hi Ananda, great tips on how to get the paint distressed look the easy way. Might try. thanks for the tutorial . Before the wet paper dries, paint the wood then carefully lift each piece of paper off the surface.
Paint the wood with the color for the next layer. Looking for a super simple tutorial on how to distress wood?
hi fazi, yes chalky paint and many other types of paints will work. You can do a sanding pass with the 100 grit and then another pass with the 150 grit and finally, one last lightly sanded pass to smooth out your edges with the 220 grit. Right? 8:00 am - 4:30 pm PST/PDT, Friday excluding Holidays Start with your 100 grit sandpaper (which is the roughest sandpaperthe higher the sandpaper number the less rough it is). These distressing wood techniques are my favorites because they are all super easy, give great weathered wood results, and dont require any special materials or tools. My biggest thing is when I was working on a kitchen table years ago I sanded it smooth TOO much and got into the wood veneer too much. When it was dragged across, it gave the effects of knots from wood and it was completely unexpected! (I used dark brown.) I want to paint and distress an oak table for my kitchen but am worried how well it will wear with two kiddos in the house. Never thought of that, will try that sometime! And the photos are amazing, the colors, the vintage style is stunning. I like to slightly (very slightly) dampen my cloth to make sure it gets all the sanded pieces. And you can mix up these techniques! It is great for wood with lots of textures on the surface.
disclosure: please note that affiliate links are used in this post. The 3 most popular techniques to distress your beautiful piece of furniture are: Youll probably find that one of these distressing techniques is going to become your go-to technique for most of your projects. Now I just have to try it myself I have been meaning to make some photography backgrounds so maybe one day this summer. xo. Looking forward to Tuesday! I think the teasing bits of table you showed looks amazing with that fab rug. Dip the end of a wood block in paint and drag it along the surface. If youre painting a piece made of raw or primed wood or MDF, then itll likely be ready for its second coat within an hour. Before you go to the next step, you want to make sure to wipe down your table with a tack cloth.
You want to get a pack of sandpaper with different types of sandpaper in itranging from 100 grit to 220 grit like this. You can always apply more pressure if youd like. Old paint brushes with hard bristles work great here. Make sure to apply only a little pressure at first, because you dont want to take off more of the paint layer than you intend. Here I am using this method to create a piece with layers of wood, plus brown, white and yellow paint. Tear small pieces of paper, vary the sizes and shapes for a natural look. This is a popular technique for when youre layering colors, because you can use it to create a natural looking worn effect without any messy dust! This is such a cool DIY - I love this one!!!! I used this distressing technique to create these faux zinc letters as you see in the video below. Thanks so very much for sharing. Paint the wood at random spots. Got paper? Apply one coat of paint to your piece; let it dry completely. Montreal Canada. Ive tried them all and this is one of the easiest and simplest ways to make wood look distressed. In super sad news, I cant show you the entire table just yet. Full disclosure here . Start by painting the wood and letting the paint dry for a few minutes. Allow the paint to dry completely. Let each layer dry, and sand in between layers. I've used both and have a debate going on in my head. Cant wait to see the entire look! Its super easy to do when you follow these steps: Apply one coat of paint to your piece (in this case we chose Bliss) and let it dry completely. And at the end of the day? youre the best! Have fun distressing and making the table delightfully imperfect. and I can NOT wait to see the full reveal of this space! (See more about these techniques in the wet-distressing and dry-distressing sections above). Great tutorials; clear and easy to follow. Wonderful information KariAnne! polytec Thank you so very much for demonstrating how to do this distressing simple method. , Wo ist der Link um eine andere Sprache anzuklicken? Play around and have fun! The char marks will show through and look like cigar burns. So good and so easy!!! The dry brush technique is great for creating an aged and scratched look. If youre painting a piece made of raw or primed wood or MDF, then itll likely be ready for its second coat within an hour. I was treating the pieces too gently while trying to distress them. Cover a work surface, ideally a calm day outdoors, with newspaper. The gorgeous yellow is Decoarts Outdoor Living seriese paint Harvest. To find out how to use multiple colors for a truly shabby-chic look, watch this tutorial! These techniques are a great way to revive vintage furniture without ending up with pieces that can look too jarring or pristine. Love it! finish antiquing 8:00 am - 2:30 pm PST/PDT, 2021 Copyright Country Chic Paint | All Content Reserved | Terms of Service Privacy Policy | Instructions en Francais | Crafted by FOE. Part of the joy of the distressing process is being messy and uneven and a little random. The color is perfect for adding depth to distressed wood. Did you do that also? And that life lesson is so on point! There are soooo many truly gifted and creative people out there. Don't overthink it! Add a base coat to the piece of furniture before you get started.
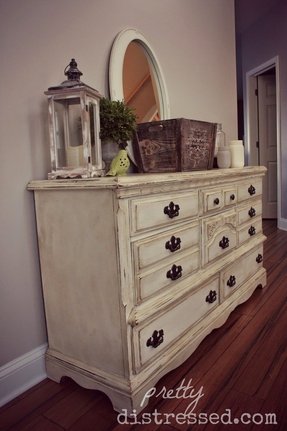
They were first painted white then red. You can see that the table needs another coat if we wanted it to be perfect. Use a damp rag to wipe away excess dust regularly so you can see how much paint youve actually removed. Love it! Love the hand sander idealooks way easier and neater than using sandpaper sheets and manual sandinglove the finish. Looking forward to seeing your room reveal! I love the turquoise looking wood pieces you made! This has given me a boost of confidence and I hope to make September the month to make at least one of those tables happen. A big thank you to our friends at Decoart for sending their gorgeous paints for our projects! crackle paint distress candy rock clear Loved these techniques. This technique will only remove some of the paint before it dries. I think I am adding it to my Christmas wish list! Ive already shared this amazing french door update and this $40 table makeover. chippy I just painted a sign for a thrift store redo and used a brush to lightly go over tacky craft glue. After you have lightly sanded the wood, but before you apply a new coat or finish, take a small piece of chain link, like for a padlock and chain, and hit the wood with it a few times in various spots to make some dents. To make the finished piece look more aged, rub a thinned paint, such as a honey gold or dark brown, over the painted piece. My passion is to create nature inspired homes and beautiful gardens through creative DIY projects. All three methods work similarly in the way that they create a resist in certain spots so the paint can be lifted off later. If you love the aged rustic look of weathered wood, you are likely to have wondered how to distress wood or how to distress furniture. Can't wait to see the big reveal! Try using a combination of these methods, and use both a wet cloth and a sanding sponge to create the look you want. Apply a second coat in a different/contrasting color. Saving it to give it a try soon. One question from this total diy newb--what's a tack cloth and how does it compare with a regular cloth? I will definitely try a couple of these. Sealing it will be goo too. furniture distressed painted paint jenniferdecorates antiquing acrylic wax Then use a water-based sealer to seal the table. Wait about 1-2 hours until the paint is dry to the touch. Subscribe to our weekly email for tips, inspiration and giveaways. It is great for creating either single or multi-layered distressed look. I was devastated. Thank you! If you are painting a previously painted surface, then its better to give the paint a good chance to cure. This is cool! You made this table look like a piece naturally worn by use over time. I am getting so many ideas! This is the easiest (and fastest way) Ive found to distress wood. Thanks Amanda! We want the look but the peeling needs to be tamed. I am so glad you chose to share this! I can't wait to see the rest of the room! For laminated wood we recommend a light sanding or even priming before the first paint coat, and curing for 24 hours before continuing on to the next step. Thanks for sharing this! Love the teaser! Great article with very helpful tips. I'm going to try it!! Think of yourself as a sanding artist. I love how it turned out for you. Wear a dust mask or respirator to help avoid breathing in the fumes. If the piece is already painted, sanding through the paint in some areas of natural wear will contribute to the distressed look once finished. So, its best to not wait too long before you distress your piece. This method is similar to the first technique, which is sanding. Once your final paint coat is dry, you can start distressing it with fine-grit sandpaper. The key is to sand random areas that tend to get bumped or scratched naturally, so it looks organic. Or You might need to add another coat of sealer to ensure all the stain and distressing stays exactly where you distressed it. Check out the final finished nightstand and full tutorial here. Start with a piece of wood and the bottom layer color. You cn also use a propane torch with a spreader nozzle, thank you so much larry for sharing these great tips! With this table, there are the edges of the tabletop and the curves of the legs and the sides of the legs and the molding just under the tabletop. Let dry completely. This just fits the bill perfectly. Use the wet rag to gently rub across the surface in a back & forth motion. So glad you are safe from Hurricane Laura. Or, jump right in! You did a great job on the table. Dip each piece in water and place it onto a piece of wood. Distressed wood look beautiful in so many styles of homes from farmhouse, shabby chic, and country, to industrial and modern. Thanks! 25 beautiful kitchen cabinet paint color palettes! Cover any areas on the furniture that you do not wish to paint using painter's tape. furniture distressed paint finish painted diy achieve wood dresser decor painting pottery barn tipjunkie distressing distress bedroom antique makeover stain Tip: instead of plain sandpaper, wed suggest sanding sponges or a sanding block. Sanding through the top coat of white reveals some green and some bare surface beneath it, creating that distressed appearance. the candle wax doesnt show at all. Have a wonderful week! Make sure that your first coat of paint is properly cured so that it wont come off when you distress it.
if you notice them, you can always scrape a little with something like a credit card.