With this, optimize expenses and detect possible phantom consumption. This release contains a total of 59,551 packages of which more October 1, 2021 Comment document.getElementById("comment").setAttribute( "id", "ae13a12ece5cf3ffd936cae4736abd87" );document.getElementById("b61f091a2c").setAttribute( "id", "comment" ); document.getElementById( "ak_js_1" ).setAttribute( "value", ( new Date() ).getTime() ); Tuya, the manufacturer of these plugs has taken some preventative measures that make the below mentioned OTA flashing method impossible. You signed in with another tab or window. Change), You are commenting using your Twitter account.
Config is as suggested by Pat Ive taken one apart and checked the signals and it seems correct. Fill in your details below or click an icon to log in: You are commenting using your WordPress.com account. WARNING: This is an advanced tutorial and requires touching the electrical panel of the house, that implies certain knowledge of electricity and electronics, as well as ensuring the total cut of the current before handling. You can then use this information as events in Home Assistant to create automation, such as sending you notifications on your smartphone or via Alexa or Google Assistant. # Enable Web server This may take some time to complete. Try to connect your ESP32 to it.
go to the main dashboard and click records under Smart energy meter. I can confirm that this still works with the Gosund plugs currently sold on Amazon.de. Find the newly created project and click release. https://github.com/esphome/esphome-docs/blob/current/devices/teckin_sp20_us.yaml. current: https://community.home-assistant.io/t/esphome-blitzwolf-bw-shp6-configuration/113938/2, Also for those who can give a static IP but face issues with DNS (like it stays temp_flash.local), you can change the name: Wide open meter boxes with exposed terminals. Bu January 7, 2022 For those who also have a BW-SHP6 (instead of the BW-SHP2!)
Well, to answer my own question, heres what Ive done so far. Should we do our computation on the microcontroller or on the server? Ill take a look to see if thats the case for me too. Energy, Thank you for taking the time to talk about the safety required around the energized parts and especially when working with CT circuits. id: homeassistant_time, binary_sensor: 1.1 Amps 245.7 Volts 516 Watts Meter: 2.11Amps Pzem, If not, then something is up with your WiFi. Here are the steps you can follow to build a smart IoT based energy monitoring device to track energy consumption. For this project we used NodeMCU (ESP8266). (It also needs the Time component to know when midnight rolls around, in order to reset to zero.) web_server: Follow these steps to install the ESPHome add-on in HA.
  Obviously you would need to also provide a D1 Mini with ESPHome and a SCT013 current transformer. Change), You are commenting using your Facebook account. Crazy to me as well. ESPHome,
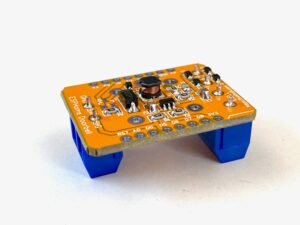
Home Assistant running on RPi 4 under Docker / Portainer I get strange upwards lines in my graph at periods of no usage. Did you make it work yet? Even replaced the antenna with a external one for better coverage. Can you speak more to this? To combat this problem Ive bought a bunch of 10$ energy meters which can be flashed without any soldering to the awesome ESPhome firmware! Once you have the file in place in the files directory wewe can start the flash script. Do you have a working unit? unit_of_measurement: V Problem with Port 53 being used already, stopping that program. Once we have voltage and current, multiplying them gives us power at a particular instant. sensor: Will it work? You can then replicate the code and change the CS_Pin and CT identifiers. Once ready we can go to the circuit. With it you can transfer files over an SSH connection and transfer the file over the Linux PC. Relay: GPIO4 The button on the top works. Im not fully sure what module you have, I show the EU Gosund version. name: ${plug_name}_Wattage 100A noninvasive sensor - SCT-013-000, If you dont want to use a smart plug then you could use one of these boards . esphome flashed and working good. Does it work? Use CTRL-F to find and replace energy_temp with unique values for this specific meter. Measurement, Thanks Quindor for the extensive video and blogpost! pin: GPIO3. Installation on a RPI3 B. Logs show no errors, but the communication is never started. platform: gpio You can buy a 3.5mm female audio jack to connect your existing SCT013 AC clam sensor to the ESP or strip the SCT013s 3.5mm jack wire and then plug it into the circuit. You can also build one, as I did, by following this circuit diagram. The fourth and last video in this series (for now) is going to be how we were able to lower our power usage because of the insight these plugs provided and some automations using Node-Red that can be configured to again, use less power and hopefully, in the end, make these plugs pay for themselves! The Tasmota website has a lot of information about this behaviour. Didnt use the app, solder method worked. This will download the .bin firmware file to your computer. Ravi is an expert tech explainer, IoT enthusiast and Linux lover with a background in Big Data and Application Development. ESP32 NodeMCU pin: GPIO15 2020-04 I have getting reports the Teckin versions might sometimes have different hardware now (Realtek chipset), please use links to go to Amazon and select a different Tuya ESP based model! As always, it can be done by USB or if we already have it previously configured by OTA. I dont use ESPHome, but have you checked the documentation? If we have made the connections well and the line that we are measuring is currently consuming, we will see how the values shown change. Once this is done, turn on the NodeMCU by connecting it to a micro USB power source. name: ${plug_name}_Wattage Any ideas appreciated! platform: homeassistant This guide will show you how to do this and how to get everything setup in Home Assistant and Grafana! at home assistantgo to the Settings and click Add-ons, backup and admin. The new firmware will be compiled and uploaded wirelessly. You can support me through Paypal, GitHub or simply by disabling the ad blocker. Ive also done the same for the current_resistor and voltage_divider values so you can always edit them at the top! I noticed an issue was already opened on the Tuya-Convert project page. ESP8266 Mains Current Sensor - Wemos - Current transformer - SCT013 - 100A/50mA Split Single Phase Real Time Whole House Energy Meter v1.4, Expandable 6 Channel ESP32 Energy Meter Main Board, CircuitSetup/Split-Single-Phase-Energy-Meter/blob/ab6d62cceb1a1c65cf83e59deb13024d54952bda/Software/examples/HA-ESPHome_energy_meter_detailed_power.yaml, digiblur/digiNRG_ESPHome/blob/38a65c12c91337440c558cb50b25f5f440334fee/digi_nrg_2chan32.yaml. We have two methods to perform this power integration: onboard the microcontroller with ESPHome, or on the Home Assistant server. August 24, 2021 You can also split the usage into hours. Much like our Split Single Phase Energy Meter, the 6 channel energy meter uses curr. I recently ordered a Blitzwolff BW-SHP6 and was able to follow your instructions including OTA with tuya-convert. He spends most of his weekends working with IoT devices and playing games on Xbox. Follow our previous DIY guide to install and setup the home assistant on your Raspberry Pi. Whole home power monitoring with ESPHome - 6 Channels & 2 Channels. number: GPIO13 # Higher value gives lower watt readout If you are not experienced, stop here or continue at your own risk. We are going to need these later on! 3 minute read. id: ${plug_name}_LED_Blue For people purchasing the Teckin SP22 from Amazon.de, I found that the pinout is different from the one in the configuration above here: Button: GPIO1 What do you use to display the data from your energy meter? whether it is on or off. pin: GPIO2 2 minute read. Wondering if computers use a lot of energy? Since the smart energy meter is online and connected to the Internet, you can upload the code wireless. Enter the name of the configuration, such as smart energy meter, and click next one. Did you by chance try the plug in the Tuya App? sel_pin: digiNRG - Whole Home Power Monitoring with ESPHome, Sample Calibrations for Gain Voltage (gain_voltage), CircuitSetup 6 Channel or 2 Channel Board. Someone commented on my videos that since a recent version of ESPhome its now possible to use variables or as they are named in ESPhome:substitutions. US Style: https://geni.us/yUqtLDb. restore_mode: ALWAYS_OFF I work in high voltage utility and industrial applications and you wouldn't believe the damage an open CT circuit can cause. pin: GPIO1 digi_nrg_6chan32.yaml - Included in this repo name: ${plug_name} switch.turn_on: red_led . There were some slight variations (especially the menu while flashing) but in general it worked very well. But i dont want to use smart plugs or sonoff. select file com Port, browse to .Wastebasket Firmware file and then click ESP . name: ${plug_name}_button The Batman Credits End Scene Explained: What is a Ratalada? You dont use Docker, Portainer, nor ESPHome ? According to Tasmota, The Teckin SP23 appears to be a clone of the BlitzWolf SHP2, but I dont see that listed as an option on ESPHome. To get a higher wattage use a lower number for the current_resistor. LED RED: GPIO3, Mine are almost identical, the only difference is that the relay is on GPIO14, check the diffent pieces of HW here https://www.esphome-devices.com/devices/BlitzWolf-BW-SHP2-Power-Monitoring-Plug#hardware-revision-v23base-config, Has anyone got the Teckin SP23 working? Split Core Current Transformer 100A/50ma To build this smart energy monitoring device, you need the following. Ever since weve moved to our new house we have been having trouble keeping our energy usage in check. NodeMCU, D1 Mini, or ESP32 microcontroller. If you are going to power the ESP module with a USB cable and feed the PZEM-004T module from its 5V/VCC and GND pins, check that these pins offer the desired current. on_press: This differs per Linux version, in my case Im using Ubuntu 18.10 which renames adapters. the map tuya-convert is now on the raspberry only the command /install_prereq.sh cant exclude. go to the Configuration>Devices and Services> Add integration. power: For more accurate values, we recommend that you use a multimeter to measure the current drawn by a device and reported by the SCT013 sensor. On the upside, doing this math on the server meant data in progress will be tracked and saved in a real database, kept on a real storage device instead of fragile flash memory. current_resistor: ${current_res} In the search bar, type Homepage Then click Homepage listed under Home Helper Community Additions. platform: homeassistant Update 2019/08/24 - For v1.2 of the board your voltage calibration will be high, >64,000. By improving the circuit and protecting it, we can mount the energy meter that we have just built in our electrical panel and control consumption and other parameters that provide data on how our electrical installation behaves.
platform: total_daily_energy Do you perhaps have periods where your device uses 0 Watt? I am trying to integrate the CircuitSetup 2 ch unit into HA with ESP home and cant get it to work. msft esphome pzem This is normal. unit_of_measurement: W Its only for new ones that are made in the factory right now or you connect to the app. ESPHome provides two parameters to mitigate wear: we could set min_save_interval to a longer duration in order to reduce the number of writes, or we could set restore to false and skip writing entirely. i am now planing to do some scripting and use RPI with custom board for 3phases substitutions: Or watch the video below and then decide if you want to set this up. So make sure to watch that too, in that video I will refer to text blocks which can be found here in this article. fill(0) in the grouping should help, but doesnt for me. I have been receiving reports that the Teckin plugs sold in the US now contain an incompatible Realtek chipset. Although this is a written guide its meant to be used in conjunction with the video I made. If your file is not on the machine you are running the flash software on (for instance you are using a Raspberry Pi with a clean raspbian install) you need to transfer it over. platform: gpio No updates right now, but the 2.0 method should work on plugs that have the blocked firmware! plug_name: teckin_plug In order to avoid getting flooded with data, we can use ESPHome sensor filters to aggregate data points. SCT-013-050 50A/1V - 15420 It's the setup/calibration too for reference material later. id: ${plug_name}_Wattage If you are not familiar with ESPHome, I recommend you read this article and go through its documentation here. pin: GPIO13 And the led turns red as soon as the relay is switched on, time:
This goes under the question about the 30 min video. ota: Save it and click fix. multiply: 0.001 For anyone checking got a pack of 4 Gosund Sp1 from amazon.de worked very easy with tuya-convert or rpi3. multiply: 0.001 change_mode_every: 8 switch: The first I adjusted the resistor value to get the right current power now wrong. 5 minute read. (Works for PC or Raspberry Pi without WiFi), PR10-C Power Meter:http://geni.us/h8kokVq. id: relay I bought 2 of these plugs after watching them : ). Check the tuya-flash github page, they have a wiki with the pinouts for lots of different models! platform: gpio then press Open Web UI To launch the ESPHome Dashboard. id: red_led You would be surprised I was down in Mexico a few years ago on a trip and right on the busy street. The idea is to carry out tests on this scheme and then carry out a more adequate and safe assembly and installation, since we remember that it will go inside the electrical panel. Awesome vid! After I restarted Home Assistant, a new tally started counting up on my dashboard, but I could not do anything else with the user interface element. If I had to guess, if it doesnt connect to your WiFi, you would have something wrong in the WiFi section of your config. restore_mode: ALWAYS_ON We are going to follow a fairly simple scheme that can be adapted to different needs and assemblies. The steps are as follows. Pay attention! Any updates on the Tuya Convert 2.0. port: 80 He uses a board from CircuitSetup plus an ESP32 with ESPHome. Can you explain if the complete git clone needs to be transferred to the root map of the raspberry pi? By default, the tally is saved in flash memory every time a power reading arrives. You can also use the SCT013 sensor rated 5A 1V, 10A 1V, 15A 1V, 20A 1V, 50A 1V or 100A 1V according to your requirements. Just the button is not working. doesnt connect wifi to my network and Home Assistant / ESPHome. inverted: True Do not cut the cable or pierce the internal wires. I dont use Docker, Portainer, nor ESPHome so Im not sure I can help. That I dont know, if you can flash something to the plugs that support Homekit, then it can work, other then that, I dont kow. Which build is correct? # Remember to change the platform and board as appropiate to your ESP module. After flashing the firmware, the ESP MCU will connect to Wi-Fi and be online in the ESPHome Dashboard. Once the firmware is compiled, click Download project. First, create a minimal configuration that just connects to WiFi. This will install the ESPHome Dashboard into your home assistant.
A simple way to achieve this goal is by installing energy meters per device and/or globally throughout the home.
But from this blog we have preferred to make our own for very little money and that is also not invasive, that is, it does not require that the line with the current to be measured passes through the device, therefore, its assembly and use is safer. garage door assistant shelly smart controls esphome opener sensor: Interesting, I havent noticed a difference. Curiously, I found no way in Home Assistant user interface to add this to my instance, I had to go and manually edit configuration.yml as per documentation. name: ${plug_name}_Amperage Once the software is configured and the circuit is connected, we can plug in the transformer, we wait a few seconds and we can access the Web Server by typing the IP of the device in any Web browser.+. document.getElementById( "ak_js_1" ).setAttribute( "value", ( new Date() ).getTime() ); TMP36 Temperature Sensor + ESP8266 = Not a GreatTeam, High-Side Fan ESP8266 PWM UsingOptocoupler, ESP8266 Controlling 4-Wire CPU CoolingFan. name: ${plug_name}_Total Daily Energy api: As mentioned above, the following text blocks are for if you want to follow along with the video! voltage_div: 940 platform: ESP8266 Thank you in advance for your help!! Cheap Compatible WiFi dongle: https://geni.us/e2oGA platform: gpio
This and other articles complement the documentation of the GitHub repository where all the configuration of my ESP8266/ESP32 devices with ESPHome are available. The calibration can be changed in the ESPhome code by varying the current_resistor and voltage_divider values. Besides, it also helps you conserve energy and prevent wastage. SCT-013-000 100A/50ma - 32498 I dont know much about Unix systems. Hence integration integration (which is also very annoying to search for). Instructions for setting up ATM90E32 energy metering sensors. New buyers might want to back off until a fix is found and released. In my case the adapters where renamed to different names so I had to change them in the config.txt file. Changing the values, i could set up the voltage, and the wattage, but the current shows almost the half of the measured one. there is something that i do wrong on that part. update There is updated code in which you dont have to replace all the values yourself, check down below for updated code. Your email address will not be published. flash. current: Can you advise on how to use it with HA? By any chance do you know the new GPIO for this board? If we have space in the frame, we can buy boxes with support for din rail (in AliExpress there are several models) and place the components inside. However, what I can suggest for you is to start your ESPHome configuration from scratch. The system collects data in logs and displays it in a meaningful way that you can use further to perform actions, such as sounding an alert or sending notifications on your smartphone or Alexa/Google Assistant for high power usage or when power usage reaches a certain threshold. voltage: I just get an error This entity does not have a unique ID. Then replace the ones in filters The values are as described above. Madeline announces her due date after revealing the, Cowboys don't have a closed door when signing the 4-Time Pro Bowler, Thanos' son revealed the true secret of Marvel's ultimate power, Kirby and the Forgotten Lands wild mod bodes well for the future of the series, Supreme Court Reimposes Death Sentence for Boston Marathon Bomber. Required fields are marked *. restore_mode: ALWAYS_ON inverted: True The next step is to sum up all of these readings over time to calculate energy produced/consumed. Domotic, There are certainly advantages to either approach, but right now I lean towards server-side because that lets us put the microcontroller to sleep. switch.turn_off: red_led, platform: gpio
ESPHome will compile the code and create the binary or .bin firmware file, like smart energy meter. # Multiplication factor from W to kW is 0.001 ESPHome is a Home Assistant add-on that will be used to create and flash custom firmware on an ESP32, NodeMCU, or D1Mini microcontroller. select room (Select the default room if you havent created any rooms yet) and click next one. This will be part of the second video where we will flash the full config on the now ESPhome running smart-plug and link it to Home Assistant. https://esphome.io/components/esphome.html#esphome-changing-node-name, Hi Guys, Im looking for an idea to monitor the power consumption of my minipc with HA. In this guide, you will learn to build a smart energy monitor or smart electricity meter from scratch using the ESP8266 module, such as NodeMCUAnd the ESP32, or D1 MiniAnd the SCT013Non-invasive AC sensor. cf1_pin: GPIO14 inverted: True CircuitSetup 6 Channel or 2 Channel Board If you want to buy any of these energy meters I would appreciate it very much if you used any of these (affiliated) shopping links! Besides monitoring energy use by the whole home, you can build various smart energy monitoring sensors with the SCT013 or PZEM-004T sensor to effectively and accurately track energy use by individual or specific household appliances, such as heating, ventilation and air conditioning, electric heaters, and motors , heaters. switch.toggle: ${plug_name}_LED_Blue (LogOut/ Can confirm this is still working. Powered by Discourse, best viewed with JavaScript enabled. Using an INA219 breakout board, I could continuously measure voltage and current passing through a circuit. When I have time Ill try and and make an updated video about it! Create a network test with password test123456789, WPA2. click smart energy meter Then click one device. id: ${plug_name}_Relay The easiest way to do this is by downloading the file on your desktop as instructed in the video and then running a program called WinSCP or FileZilla Client. , etc. logger: Your email address will not be published. I immediately bought several Blitzwolf BW-SHP2 via the AliExpress the affiliate link as a token of appriciation and for adding them to my home automation setup of course. This also allows you to see the activity status of the device, i.e. With the price of electricity at historical highs, and the forecast of its continuous increase, we believe that it is necessary to have a way of measuring electricity consumption and the parts of the house with the highest energy consumption in order to optimize its use, and, in this way reduce our bill. However, these now seem to be shipped with updated firmware that is not yet supported by tuya-convert. I cant figure out why this is. , Energy meters: Or is it a multi-stage flash. If power readings are taken at high frequency, this could wear out flash storage very quickly. Well, this probably wont be much help but I wrote my own firmware as I build a device based around this board with an STM32 Blue Pill, ILI9225 TFT screen and W5500 Ethernet module. Once that is running and youve entered yes, open a second terminal window or SSH session and run the following to see the wifi log file. In this video we are going to upload the actual config we are going to use in ESPhome, calibrate the energy meter and then make it available in Home Assistant and build a simple graph, if you want to follow along, take a look at the video and find all text fields you might need below! Tnx. Powered by a worldwide community of tinkerers and DIY enthusiasts. voltage_divider: ${voltage_div} You also didnt post your config, but instead theirs. Since releasing this video and article a new method of calibrating these plugs has become available within ESPhome, this is easier to use and delivers a better (more accurate) result in the end! 9VAC Power Supply, If you have any to add or changes to these, pleast let us know! name: ${plug_name}_button selec esphome em2m Oh wow, I got scared when I saw that the feed from the street is screwed in and the terminals are exposed! unit_of_measurement: A name: ${plug_name}_Status, switch: How can i set it up to the correct level? Be careful while removing the extension board cable. Video Demostration and Setup - https://youtu.be/BOgy6QbfeZk. Its available for Windows, macOS, and Ubuntu. I find it hard pressed that you got one with updated firmware, its going to take weeks if not months before those are out of the factory. platform: uptime # Enable logging platform: total_daily_energy unit_of_measurement: A The danger with using someone elses config is that sometimes there are code changes which may invalidate that configuration. The downside of doing this calculation on the controller is that our runny tally must be saved somewhere, or else we would start from zero every time we reset. platform: hlw8012 If your electricity meter does not display the current value, or you cannot access the meter, follow the next method to calibrate the sensor values. Lots of stuff to coverand Travis does a good job. Press question mark to learn the rest of the keyboard shortcuts. inverted: True I got the following working with one of the latest Blitzwolf BW-SPH2 ( SPC1 V2.4 on the printboard ) Thanks. Thanks for the great videos. To learn more, see the Power Management section of the Home Assistant documentation. An alternative way to calibrate sensor values You can peel the outer covering from the extension board cable and expose the inner wires. To connect SCT013 to ESP32 or NodeMCU, you can buy This unit is on ebay To connect or connect the SCT013 sensor to a D1 Mini, NodeMCU, or ESP32. (LogOut/ inverted: True If it does work, then add the power monitor. ravi singh Change your Wi-Fi credentials and passwords. Connect the NodeMCU, ESP32, or D1 Mini board to your PC or Mac using a micro USB cable. esphome: However, the laptop will have a larger power footprint and consume more power than a Raspberry Pi 3 or a Raspberry Pi 4. time: I would not have been possible in my panel, either at the entrance or on any circuit. If so, switch back to your regular WiFi. I hope you have a lock on your electric panel to keep curious hands off it!! SCT-013-000 100A/50ma - 3900. digi_nrg_2chan32.yaml - Included in this repo Debian 11 (bullseye) has been available for use on the stable channel for several months now. Change). But by default it does not reset at midnight, so the number keeps ticking upwards.
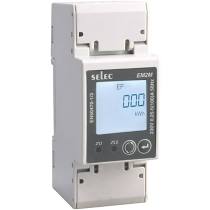
Voltage works in reverse, to get a higher voltage, use a higher number in voltage_divider! Vanilla bw-shp6 from factory not working with tuya convert. Doing more processing with this data is on the to-do list. Save my name, email, and website in this browser for the next time I comment. When I look at the outputs though This post has been sponsored by donations from users who visit it. switch.toggle: ${plug_name}_Relay The rest are pre-adjustment current wrong. Make sure to fill in your own WiFi SSID, password and passwords for API and OTA! Perfect to run on a Raspberry Pi or a local server. I've been using RTL-SDR to read power from my meter; however, I have received notice that the meter will be changed out soon and I will likely lose easy local access to the power data feed. To measure the current and calibrate the sensor, you need to install it on the phase wire (usually red) coming from the electricity meter to your homes distribution box. You can quickly access the dashboard from the sidebar and check how much energy is being used today. zuidwijk esphome !There is updated code lower on this page, go and copy that instead of what is above this text! You can also customize the cards in your room to add a scale that shows the current demand. id: energie_wasmachine_Wattage mode: INPUT_PULLUP voltage_divider: 871 There seems to be an issue with calculating the integral on those periods, as InfluxDB has no data at those moments. # Lower value gives lower voltage readout UK Style: https://geni.us/1DTCc Thanks for this post! yaml from CircuitSetup, and can not get it to communicate Select ESP32 for ESP32 MCU or ESP8266 if you are using a D1 Mini or NodeMCU and click next one. number: GPIO3 unit_of_measurement: kWh. (And 8 Ways to Shrink It), The xXx video game with co-op must include Vin, Survivle is a new Wordle clone with exactly the, Explanation of the second season tribute to Bridgerton, Robert Cremo III: 5 quick facts you need to know, How to activate the Great Rune of the Fetus, Final evolution of pokemon scarlet and violet may be.
Config is as suggested by Pat Ive taken one apart and checked the signals and it seems correct. Fill in your details below or click an icon to log in: You are commenting using your WordPress.com account. WARNING: This is an advanced tutorial and requires touching the electrical panel of the house, that implies certain knowledge of electricity and electronics, as well as ensuring the total cut of the current before handling. You can then use this information as events in Home Assistant to create automation, such as sending you notifications on your smartphone or via Alexa or Google Assistant. # Enable Web server This may take some time to complete. Try to connect your ESP32 to it.
go to the main dashboard and click records under Smart energy meter. I can confirm that this still works with the Gosund plugs currently sold on Amazon.de. Find the newly created project and click release. https://github.com/esphome/esphome-docs/blob/current/devices/teckin_sp20_us.yaml. current: https://community.home-assistant.io/t/esphome-blitzwolf-bw-shp6-configuration/113938/2, Also for those who can give a static IP but face issues with DNS (like it stays temp_flash.local), you can change the name: Wide open meter boxes with exposed terminals. Bu January 7, 2022 For those who also have a BW-SHP6 (instead of the BW-SHP2!)
Well, to answer my own question, heres what Ive done so far. Should we do our computation on the microcontroller or on the server? Ill take a look to see if thats the case for me too. Energy, Thank you for taking the time to talk about the safety required around the energized parts and especially when working with CT circuits. id: homeassistant_time, binary_sensor: 1.1 Amps 245.7 Volts 516 Watts Meter: 2.11Amps Pzem, If not, then something is up with your WiFi. Here are the steps you can follow to build a smart IoT based energy monitoring device to track energy consumption.
For this project we used NodeMCU (ESP8266). (It also needs the Time component to know when midnight rolls around, in order to reset to zero.) web_server: Follow these steps to install the ESPHome add-on in HA. Obviously you would need to also provide a D1 Mini with ESPHome and a SCT013 current transformer. Change), You are commenting using your Facebook account. Crazy to me as well. ESPHome, Home Assistant running on RPi 4 under Docker / Portainer I get strange upwards lines in my graph at periods of no usage. Did you make it work yet? Even replaced the antenna with a external one for better coverage. Can you speak more to this? To combat this problem Ive bought a bunch of 10$ energy meters which can be flashed without any soldering to the awesome ESPhome firmware! Once you have the file in place in the files directory wewe can start the flash script. Do you have a working unit? unit_of_measurement: V Problem with Port 53 being used already, stopping that program. Once we have voltage and current, multiplying them gives us power at a particular instant. sensor: Will it work? You can then replicate the code and change the CS_Pin and CT identifiers. Once ready we can go to the circuit. With it you can transfer files over an SSH connection and transfer the file over the Linux PC. Relay: GPIO4 The button on the top works. Im not fully sure what module you have, I show the EU Gosund version. name: ${plug_name}_Wattage 100A noninvasive sensor - SCT-013-000, If you dont want to use a smart plug then you could use one of these boards . esphome flashed and working good. Does it work? Use CTRL-F to find and replace energy_temp with unique values for this specific meter. Measurement, Thanks Quindor for the extensive video and blogpost! pin: GPIO3. Installation on a RPI3 B. Logs show no errors, but the communication is never started. platform: gpio You can buy a 3.5mm female audio jack to connect your existing SCT013 AC clam sensor to the ESP or strip the SCT013s 3.5mm jack wire and then plug it into the circuit. You can also build one, as I did, by following this circuit diagram. The fourth and last video in this series (for now) is going to be how we were able to lower our power usage because of the insight these plugs provided and some automations using Node-Red that can be configured to again, use less power and hopefully, in the end, make these plugs pay for themselves! The Tasmota website has a lot of information about this behaviour. Didnt use the app, solder method worked. This will download the .bin firmware file to your computer. Ravi is an expert tech explainer, IoT enthusiast and Linux lover with a background in Big Data and Application Development. ESP32 NodeMCU pin: GPIO15 2020-04 I have getting reports the Teckin versions might sometimes have different hardware now (Realtek chipset), please use links to go to Amazon and select a different Tuya ESP based model! As always, it can be done by USB or if we already have it previously configured by OTA. I dont use ESPHome, but have you checked the documentation? If we have made the connections well and the line that we are measuring is currently consuming, we will see how the values shown change. Once this is done, turn on the NodeMCU by connecting it to a micro USB power source. name: ${plug_name}_Wattage Any ideas appreciated! platform: homeassistant This guide will show you how to do this and how to get everything setup in Home Assistant and Grafana! at home assistantgo to the Settings and click Add-ons, backup and admin. The new firmware will be compiled and uploaded wirelessly. You can support me through Paypal, GitHub or simply by disabling the ad blocker. Ive also done the same for the current_resistor and voltage_divider values so you can always edit them at the top! I noticed an issue was already opened on the Tuya-Convert project page. ESP8266 Mains Current Sensor - Wemos - Current transformer - SCT013 - 100A/50mA Split Single Phase Real Time Whole House Energy Meter v1.4, Expandable 6 Channel ESP32 Energy Meter Main Board, CircuitSetup/Split-Single-Phase-Energy-Meter/blob/ab6d62cceb1a1c65cf83e59deb13024d54952bda/Software/examples/HA-ESPHome_energy_meter_detailed_power.yaml, digiblur/digiNRG_ESPHome/blob/38a65c12c91337440c558cb50b25f5f440334fee/digi_nrg_2chan32.yaml. We have two methods to perform this power integration: onboard the microcontroller with ESPHome, or on the Home Assistant server. August 24, 2021 You can also split the usage into hours. Much like our Split Single Phase Energy Meter, the 6 channel energy meter uses curr. I recently ordered a Blitzwolff BW-SHP6 and was able to follow your instructions including OTA with tuya-convert. He spends most of his weekends working with IoT devices and playing games on Xbox. Follow our previous DIY guide to install and setup the home assistant on your Raspberry Pi. Whole home power monitoring with ESPHome - 6 Channels & 2 Channels. number: GPIO13 # Higher value gives lower watt readout If you are not experienced, stop here or continue at your own risk. We are going to need these later on! 3 minute read. id: ${plug_name}_LED_Blue For people purchasing the Teckin SP22 from Amazon.de, I found that the pinout is different from the one in the configuration above here: Button: GPIO1 What do you use to display the data from your energy meter? whether it is on or off. pin: GPIO2 2 minute read. Wondering if computers use a lot of energy? Since the smart energy meter is online and connected to the Internet, you can upload the code wireless. Enter the name of the configuration, such as smart energy meter, and click next one. Did you by chance try the plug in the Tuya App? sel_pin: digiNRG - Whole Home Power Monitoring with ESPHome, Sample Calibrations for Gain Voltage (gain_voltage), CircuitSetup 6 Channel or 2 Channel Board. Someone commented on my videos that since a recent version of ESPhome its now possible to use variables or as they are named in ESPhome:substitutions. US Style: https://geni.us/yUqtLDb. restore_mode: ALWAYS_OFF I work in high voltage utility and industrial applications and you wouldn't believe the damage an open CT circuit can cause. pin: GPIO1 digi_nrg_6chan32.yaml - Included in this repo name: ${plug_name} switch.turn_on: red_led . There were some slight variations (especially the menu while flashing) but in general it worked very well. But i dont want to use smart plugs or sonoff. select file com Port, browse to .Wastebasket Firmware file and then click ESP . name: ${plug_name}_button The Batman Credits End Scene Explained: What is a Ratalada? You dont use Docker, Portainer, nor ESPHome ? According to Tasmota, The Teckin SP23 appears to be a clone of the BlitzWolf SHP2, but I dont see that listed as an option on ESPHome.
To get a higher wattage use a lower number for the current_resistor. LED RED: GPIO3, Mine are almost identical, the only difference is that the relay is on GPIO14, check the diffent pieces of HW here https://www.esphome-devices.com/devices/BlitzWolf-BW-SHP2-Power-Monitoring-Plug#hardware-revision-v23base-config, Has anyone got the Teckin SP23 working? Split Core Current Transformer 100A/50ma To build this smart energy monitoring device, you need the following. Ever since weve moved to our new house we have been having trouble keeping our energy usage in check. NodeMCU, D1 Mini, or ESP32 microcontroller. If you are going to power the ESP module with a USB cable and feed the PZEM-004T module from its 5V/VCC and GND pins, check that these pins offer the desired current. on_press: This differs per Linux version, in my case Im using Ubuntu 18.10 which renames adapters. the map tuya-convert is now on the raspberry only the command /install_prereq.sh cant exclude. go to the Configuration>Devices and Services> Add integration. power: For more accurate values, we recommend that you use a multimeter to measure the current drawn by a device and reported by the SCT013 sensor. On the upside, doing this math on the server meant data in progress will be tracked and saved in a real database, kept on a real storage device instead of fragile flash memory. current_resistor: ${current_res} In the search bar, type Homepage Then click Homepage listed under Home Helper Community Additions. platform: homeassistant Update 2019/08/24 - For v1.2 of the board your voltage calibration will be high, >64,000. By improving the circuit and protecting it, we can mount the energy meter that we have just built in our electrical panel and control consumption and other parameters that provide data on how our electrical installation behaves. platform: total_daily_energy Do you perhaps have periods where your device uses 0 Watt? I am trying to integrate the CircuitSetup 2 ch unit into HA with ESP home and cant get it to work. msft esphome pzem This is normal. unit_of_measurement: W Its only for new ones that are made in the factory right now or you connect to the app. ESPHome provides two parameters to mitigate wear: we could set min_save_interval to a longer duration in order to reduce the number of writes, or we could set restore to false and skip writing entirely. i am now planing to do some scripting and use RPI with custom board for 3phases substitutions: Or watch the video below and then decide if you want to set this up. So make sure to watch that too, in that video I will refer to text blocks which can be found here in this article. fill(0) in the grouping should help, but doesnt for me. I have been receiving reports that the Teckin plugs sold in the US now contain an incompatible Realtek chipset. Although this is a written guide its meant to be used in conjunction with the video I made. If your file is not on the machine you are running the flash software on (for instance you are using a Raspberry Pi with a clean raspbian install) you need to transfer it over. platform: gpio No updates right now, but the 2.0 method should work on plugs that have the blocked firmware! plug_name: teckin_plug In order to avoid getting flooded with data, we can use ESPHome sensor filters to aggregate data points. SCT-013-050 50A/1V - 15420 It's the setup/calibration too for reference material later. id: ${plug_name}_Wattage If you are not familiar with ESPHome, I recommend you read this article and go through its documentation here. pin: GPIO13 And the led turns red as soon as the relay is switched on, time:
This goes under the question about the 30 min video. ota: Save it and click fix. multiply: 0.001 For anyone checking got a pack of 4 Gosund Sp1 from amazon.de worked very easy with tuya-convert or rpi3. multiply: 0.001 change_mode_every: 8 switch: The first I adjusted the resistor value to get the right current power now wrong. 5 minute read. (Works for PC or Raspberry Pi without WiFi), PR10-C Power Meter:http://geni.us/h8kokVq. id: relay I bought 2 of these plugs after watching them : ). Check the tuya-flash github page, they have a wiki with the pinouts for lots of different models! platform: gpio then press Open Web UI To launch the ESPHome Dashboard. id: red_led You would be surprised I was down in Mexico a few years ago on a trip and right on the busy street. The idea is to carry out tests on this scheme and then carry out a more adequate and safe assembly and installation, since we remember that it will go inside the electrical panel. Awesome vid! After I restarted Home Assistant, a new tally started counting up on my dashboard, but I could not do anything else with the user interface element. If I had to guess, if it doesnt connect to your WiFi, you would have something wrong in the WiFi section of your config. restore_mode: ALWAYS_ON We are going to follow a fairly simple scheme that can be adapted to different needs and assemblies. The steps are as follows. Pay attention! Any updates on the Tuya Convert 2.0. port: 80 He uses a board from CircuitSetup plus an ESP32 with ESPHome. Can you explain if the complete git clone needs to be transferred to the root map of the raspberry pi? By default, the tally is saved in flash memory every time a power reading arrives. You can also use the SCT013 sensor rated 5A 1V, 10A 1V, 15A 1V, 20A 1V, 50A 1V or 100A 1V according to your requirements. Just the button is not working. doesnt connect wifi to my network and Home Assistant / ESPHome. inverted: True Do not cut the cable or pierce the internal wires. I dont use Docker, Portainer, nor ESPHome so Im not sure I can help. That I dont know, if you can flash something to the plugs that support Homekit, then it can work, other then that, I dont kow. Which build is correct? # Remember to change the platform and board as appropiate to your ESP module. After flashing the firmware, the ESP MCU will connect to Wi-Fi and be online in the ESPHome Dashboard. Once the firmware is compiled, click Download project. First, create a minimal configuration that just connects to WiFi. This will install the ESPHome Dashboard into your home assistant.
A simple way to achieve this goal is by installing energy meters per device and/or globally throughout the home.
But from this blog we have preferred to make our own for very little money and that is also not invasive, that is, it does not require that the line with the current to be measured passes through the device, therefore, its assembly and use is safer. garage door assistant shelly smart controls esphome opener sensor: Interesting, I havent noticed a difference. Curiously, I found no way in Home Assistant user interface to add this to my instance, I had to go and manually edit configuration.yml as per documentation. name: ${plug_name}_Amperage Once the software is configured and the circuit is connected, we can plug in the transformer, we wait a few seconds and we can access the Web Server by typing the IP of the device in any Web browser.+. document.getElementById( "ak_js_1" ).setAttribute( "value", ( new Date() ).getTime() ); TMP36 Temperature Sensor + ESP8266 = Not a GreatTeam, High-Side Fan ESP8266 PWM UsingOptocoupler, ESP8266 Controlling 4-Wire CPU CoolingFan. name: ${plug_name}_Total Daily Energy api: As mentioned above, the following text blocks are for if you want to follow along with the video! voltage_div: 940 platform: ESP8266 Thank you in advance for your help!! Cheap Compatible WiFi dongle: https://geni.us/e2oGA platform: gpio
This and other articles complement the documentation of the GitHub repository where all the configuration of my ESP8266/ESP32 devices with ESPHome are available. The calibration can be changed in the ESPhome code by varying the current_resistor and voltage_divider values. Besides, it also helps you conserve energy and prevent wastage. SCT-013-000 100A/50ma - 32498 I dont know much about Unix systems. Hence integration integration (which is also very annoying to search for). Instructions for setting up ATM90E32 energy metering sensors. New buyers might want to back off until a fix is found and released. In my case the adapters where renamed to different names so I had to change them in the config.txt file. Changing the values, i could set up the voltage, and the wattage, but the current shows almost the half of the measured one. there is something that i do wrong on that part. update There is updated code in which you dont have to replace all the values yourself, check down below for updated code. Your email address will not be published. flash. current: Can you advise on how to use it with HA? By any chance do you know the new GPIO for this board?
ESPHome will compile the code and create the binary or .bin firmware file, like smart energy meter. # Multiplication factor from W to kW is 0.001 ESPHome is a Home Assistant add-on that will be used to create and flash custom firmware on an ESP32, NodeMCU, or D1Mini microcontroller. select room (Select the default room if you havent created any rooms yet) and click next one. This will be part of the second video where we will flash the full config on the now ESPhome running smart-plug and link it to Home Assistant. https://esphome.io/components/esphome.html#esphome-changing-node-name, Hi Guys, Im looking for an idea to monitor the power consumption of my minipc with HA. In this guide, you will learn to build a smart energy monitor or smart electricity meter from scratch using the ESP8266 module, such as NodeMCUAnd the ESP32, or D1 MiniAnd the SCT013Non-invasive AC sensor. cf1_pin: GPIO14 inverted: True CircuitSetup 6 Channel or 2 Channel Board If you want to buy any of these energy meters I would appreciate it very much if you used any of these (affiliated) shopping links! Besides monitoring energy use by the whole home, you can build various smart energy monitoring sensors with the SCT013 or PZEM-004T sensor to effectively and accurately track energy use by individual or specific household appliances, such as heating, ventilation and air conditioning, electric heaters, and motors , heaters. switch.toggle: ${plug_name}_LED_Blue (LogOut/ Can confirm this is still working. Powered by Discourse, best viewed with JavaScript enabled. Using an INA219 breakout board, I could continuously measure voltage and current passing through a circuit. When I have time Ill try and and make an updated video about it! Create a network test with password test123456789, WPA2. click smart energy meter Then click one device. id: ${plug_name}_Relay The easiest way to do this is by downloading the file on your desktop as instructed in the video and then running a program called WinSCP or FileZilla Client. , etc. logger: Your email address will not be published. I immediately bought several Blitzwolf BW-SHP2 via the AliExpress the affiliate link as a token of appriciation and for adding them to my home automation setup of course. This also allows you to see the activity status of the device, i.e. With the price of electricity at historical highs, and the forecast of its continuous increase, we believe that it is necessary to have a way of measuring electricity consumption and the parts of the house with the highest energy consumption in order to optimize its use, and, in this way reduce our bill. However, these now seem to be shipped with updated firmware that is not yet supported by tuya-convert. I cant figure out why this is. , Energy meters: Or is it a multi-stage flash. If power readings are taken at high frequency, this could wear out flash storage very quickly. Well, this probably wont be much help but I wrote my own firmware as I build a device based around this board with an STM32 Blue Pill, ILI9225 TFT screen and W5500 Ethernet module. Once that is running and youve entered yes, open a second terminal window or SSH session and run the following to see the wifi log file. In this video we are going to upload the actual config we are going to use in ESPhome, calibrate the energy meter and then make it available in Home Assistant and build a simple graph, if you want to follow along, take a look at the video and find all text fields you might need below! Tnx. Powered by a worldwide community of tinkerers and DIY enthusiasts. voltage_divider: ${voltage_div} You also didnt post your config, but instead theirs.
Voltage works in reverse, to get a higher voltage, use a higher number in voltage_divider! Vanilla bw-shp6 from factory not working with tuya convert. Doing more processing with this data is on the to-do list. Save my name, email, and website in this browser for the next time I comment. When I look at the outputs though This post has been sponsored by donations from users who visit it. switch.toggle: ${plug_name}_Relay The rest are pre-adjustment current wrong. Make sure to fill in your own WiFi SSID, password and passwords for API and OTA! Perfect to run on a Raspberry Pi or a local server. I've been using RTL-SDR to read power from my meter; however, I have received notice that the meter will be changed out soon and I will likely lose easy local access to the power data feed. To measure the current and calibrate the sensor, you need to install it on the phase wire (usually red) coming from the electricity meter to your homes distribution box. You can quickly access the dashboard from the sidebar and check how much energy is being used today. zuidwijk esphome !There is updated code lower on this page, go and copy that instead of what is above this text! You can also customize the cards in your room to add a scale that shows the current demand. id: energie_wasmachine_Wattage mode: INPUT_PULLUP voltage_divider: 871 There seems to be an issue with calculating the integral on those periods, as InfluxDB has no data at those moments. # Lower value gives lower voltage readout UK Style: https://geni.us/1DTCc Thanks for this post! yaml from CircuitSetup, and can not get it to communicate Select ESP32 for ESP32 MCU or ESP8266 if you are using a D1 Mini or NodeMCU and click next one. number: GPIO3 unit_of_measurement: kWh. (And 8 Ways to Shrink It), The xXx video game with co-op must include Vin, Survivle is a new Wordle clone with exactly the, Explanation of the second season tribute to Bridgerton, Robert Cremo III: 5 quick facts you need to know, How to activate the Great Rune of the Fetus, Final evolution of pokemon scarlet and violet may be.