Tap the wrench icon and toggle on Reference. procreate Feel free to take a look. The liquify edit options in the Adjustments tab. Whether youve never used Procreate before or you want to learn about how to get better, youve come to the right place. , Item Weight At times the superb content is unreadable simply because the editor allowed the page designers form over function. After viewing product detail pages, look here to find an easy way to navigate back to pages you are interested in.
This book along with Youtube tutorials, the Procreate manual online, and Udemy courses should make you a master in no time. Well look no further! This digital painting walkthrough is glossy and interesting, and the techniques learned here can be applied to many different art pieces.
My personal clipping stash: ready to use in your project! If you tap that, you'll see (surprise!) It goes from the sketch phase all the way through completion, so if youre curious as to how to do 3D lettering in this app, this is a good choice. Using layers is another way to add a level of professionalism to your art, and can make your work easier to edit later if needed, since you'll have put down your drawing piece by piece. Several headings in the book were fed through optical character recognition which replaced letters with emojis. Im probably just being dumb! Good start but a little confused and stuck. They are like, super good donuts, so youd really be making my day like a hundred times better. You can make rectangle selections, and ellipse selections.
If you want to achieve a traditional painting look in Procreate, this tutorial is for you! Tap and hold with three fingers to redo multiple. Reviewed in the United States on May 2, 2020. Once youve mastered the basics of Procreate, you can learn some more advanced techniques, like drawing with masks.
Tap with three fingers to redo. In this Procreate tutorial, youll learn how to create a digital illustration from scratch. Lets take a look at the eraser tool. If you use procreate, as I do as a Tattooist this book is worth its weight in Gold. Just tap the title, and type it in.
After Quickshape "fixes" your lines, you can hold to adjust the shape and size.
procreate repeating If you have less of a budget to work with, the 9.7 inch iPad is a great option because its the only non-Pro iPad that works with the Apple pencil. Heres a really specific tutorial, but again, the techniques you learn here could easily be applied to other projects. Now I can erase and have my eraser marks match the brushes and it will look seamless. Many traditional artists are making the crossover to digital art. this book is worth its weight in Gold, highly recommended, a must buy. After five successful years of working with Focal Press, 3dtotal Publishing was launched in 2010 as an independent publisher. Now, in this Procreate tutorial, youll learn the basics of how to draw in the app, of course, but also various methods of inking, coloring, and shading. Moving on to layers. To calculate the overall star rating and percentage breakdown by star, we dont use a simple average. Its robust and offers a myriad of features you can use on your iPad to create beautiful works of art from anywhere at any time. A selection of watercolor brushes I imported from Svetlana Tigai, professional known as Tsvetka, through Cubebrush. I'm looking for something now. Learn how to paint on your iPad like the professionals in Beginners Guide to Procreate, a comprehensive introduction to this industry-standard software. Though this tutorial doesnt teach you how to draw, it does show you how to use the tools of Procreate to achieve a painted portrait look.
 needless to say, i will be enjoying the projects, they are well done. Lets select yellow from our palette and draw a banana shape. Here's 15 tips to get started. It just shows what the artists already drew. For the details of the banana, were gonna put those on a new layer. Reviewed in the United States on June 12, 2020. To do the inner orange sections, Im going to create a new layer. This is what you use to move elements around the canvas. Please try again. Reviewed in the United Kingdom on June 13, 2020, Great content but issues with reading quality. As you can see, the blur is only happening within the confines of this shape. You can incorporate text into your piece with just a few taps. The brush size and opacity are adjustable on the left-hand side. You may also like our round-up of free Procreate brushes. The Student's Guide to Painting: Revised and Expanded Edition (Dover Art Instruction). You can use templates to get ahead start. I can even turn on Alpha Lock on that layer and add texture and details. The Quickshape feature helps to rid your hand-drawn work of unwanted shaky lines and lopsided shapes. The premise for these books was to provide high-quality content to inspire and educate the next generation of digital artists, featuring the work of top industry professionals, detailed tutorials and image breakdowns. Select multiple layers by swiping right with one finger on each layer. Liquify lets you push, pull, twist and twirl lines. Converted prices are for reference only - all orders are charged in $ US Dollars ($) USD. I think its going to be a brilliant guide. You can reference the canvas itself, import an image from your iPad photo library, of choose Face, which will open your iPad's front-facing camera for self-portraits. Can you help with this? procreate
It gives me the option to print my work later on, plus a lot of the brushes I use are optimized for a high-resolution canvas. I'm partial to importing brush packs from Creative Market, but sometimes artists will sell packs on their websites. Please try again. Lets jump right in and learn about the best hardware to use with Procreate. You can tell when Alpha Lock is turned on by the checkerboard that appears next to the thumbnail. And we can turn this lime into a lemon. The dream team for using Procreate is the iPad Pro and Apple Pencil. Were gonna resize it. No matter what your artistic level is, a bit of guidance is always welcome. Use the outer ring to select your hue, and use the inner disc to fine-tune the lightness darkness or saturation of the color. Customer Reviews, including Product Star Ratings help customers to learn more about the product and decide whether it is the right product for them. Using blend mode on layer 7's clipping mask. To add colors to the palette, just select the color you want and tap in the palette box to keep it. You. Merge Down makes two layers into one (i.e., if you had Alpha Lock on to protect line boundaries in a layer, it will turn off). You're listening to a sample of the Audible audio edition. Swipe left on a thumbnail to access the same sharing options. You can also tap and see that alpha lock is enabled. Having fun is the most important part. drawing procreate ipad light lightning draw trick pro
procreate Tap add and then insert a photo. This can be useful for things like creating smooth color transitions in your drawings. You can quick select a color by tapping and holding on the screen to invoke the eyedropper. Tap "+" to add a layer. The smudge tool lives between the paintbrush and eraser icons in the top right (it looks like a finger pointing diagonally).
The pace of the book is pretty rapid, so if you are not a "good learner" it might be a little fast but I think Procreate did just a good job of placing menu items, you probably will be fine. If you're feeling totally lost, YouTuber Brave The Woods has a great video showing how it all works. Heres another lettering tutorial for Procreate that walks you through the true-blue basics of getting started with the app as well as how to do lettering on the iPad in general. A look at the color disc and colors added to a new palette. Making Art Everyday // A series of drawing prompts, tutorials, and motivation to help you overcome creative fears and establish a daily art-making practice. Procreate has quickly become one of my favorite iPad apps. The cool thing about it is you can use any of your brushes as an eraser. Hue Saturation and Brightness is something I use a lot. This double tap feature works in nine points on the color wheel and can help you find the ideal color values. These instructions show you how to create florals and leaves and then arrange them to create a full display. And then Im just gonna add a little bit of texture to those cherries just like we did before with Alpha Lock. Your email address will not be published. I bought the Kindle version which is very disappointing. Tap Symmetry and then tap Radial and then make sure Assisted Drawing is on, and then tap Done. Making Art Everyday // Drawing Challenge! But as you can see you can push, twirl, pinch, expand, and more until you have no idea what the hell you are even drawing in the first place. Want to learn how to use Procreate to draw on your iPad? Learn Clip Studio Paint: A beginner's guide to creating compelling comics and manga SOCIAL MEDIA MARKETING FOR SMALL BUSINESS 2022 6 BOOKS IN 1: The Best Guide for Beg JavaScript Coding for Teens: A Beginner's Guide to Developing Websites and Games. One way to do this is by turning on Drawing Guides. The opacity slider controls the strength of the smudging. Please try your request again later. Shelby Brown (she/her/hers) is a writer for CNET's services and software team. Learning how to do this is a real-time saver when you want to create patterns or intricate designs, but you dont want to have to copy them over and over by hand. procreate ipad app painting boring apps brushes artwork updated creative anime take create canvas five digital paint update sketch artery procreate Do you find digital art too complex/plasticky? procreate brushes drawing software sketching painting pencil app apps drawings ipad storyboard logos sketch digital storyboarding sketches creativebloq creative pixellogo Subscribe to our RSS newsletter and receive all of our articles directly in your email inbox daily.
Unable to add item to List.
*Some of the links above are affiliate links, meaning I get small percentage of the sale if you make a purchase. and I'd recommend keeping it simple to start -- especially if you don't plan to create your own brushes. Here you can browse and open all of your artwork as well as start new pieces. Lines squashed together, letters out of place so I couldnt read it very well. Bring your club to Amazon Book Clubs, start a new book club and invite your friends to join, or find a club thats right for you for free.
Reviewed in the United Kingdom on May 29, 2020. There are a few different guides like a 2d grid, isometric grid, a perspective guide, and one that is super fun, which is the symmetry feature. Scanned bits of real paper with cut and torn edges, folds, creases, grids, handwriting, painted textures, and beautiful print moire patterns. Heres another tutorial about creating masks, but the approach is slightly different.
I was anticipating this book order to better my drawing/sketch skills in Procreate after doing some researching online for good book recommendations and came across this one. iPadOS lets you use gesture controls in Procreate that can make your creative process more efficient and further personalize the app for you. Tap that and you can save the file to your device, or share it in a number of ways. It also analyzed reviews to verify trustworthiness. The website offers a variety of training products, inspirational image galleries, a free texture resource library, plus literally hundreds of free tutorials covering a variety of subjects for 3D artists and digital painters. Lets call this one Learning Procreate. New from Camera opens your iPad's camera and lets you capture a color palette by snapping a photo. Okay, now Im going to show you the transform tool. NO this will not turn you into a professional, that takes practice and patience. You can pinch and spread to zoom in or out and rotate your canvas. You can even, like, fold over, grab in the middle, and move it around and just get really weird with it. You can experiment with tools like blurring (which can provide some cool depth illusions), opacity and noise (which can give your work a less grainy look). Please try again. Instead, our system considers things like how recent a review is and if the reviewer bought the item on Amazon. Using your mobile phone camera - scan the code below and download the Kindle app. You can move it around, or put another finger on the canvas to make it snap in 15 degree increments. Its actually pretty therapeutic to spend time just kind of doodling this way and having fun. procreate 3dtotal epub ilustracion virar uii toptrendstore folgen To start adding layers to your work, tap the overlapping squares in the upper right.
Tap the arrow to exit the brush settings here. Now Im going to select a blackish-brown and a different brush and draw my details. At the bottom is the background color. This is a tip that could be applied to every art style, too. Bardot Brush was created by California-based artist, illustrator, and all-around creative person, Lisa Bardot. This YouTube tutorial by Chelsea Ekberg walks you through the process of creating 3D lettering in Procreate. This book will hold your hand and teach you through 22 step-by-step demos. If calligraphy is an artistic pursuit of yours, youll want to check out this painted calligraphy tutorial by Dawn Nicole. You dont need to get to know these settings right now, but just know that they exist. This goes over so many wonderful features of procreate, and is covered in a very comprehensive way. The Omnibus of Pen Sketching: Get, Set & Sketch like a Boss!
You can also use New from File or New from Photos to use a premade palette from another artist or generate a palette from a reference photo. When autocomplete results are available use up and down arrows to review and enter to select. It lets you easily select a color thats already on the canvas. Each brush has different abilities so experiment with different levels of pressure, the speed of your strokes, as well as the tilt of your Apple Pencil to see what different effect each brush can produce. This is a function similar to Alpha Lock where what I draw will only appear within the confines of the art on the layer below. Its a amazing book to own. There's a lot to explore in here and my advice is to let yourself experiment.
Hopefully, one of these will set you off in a whole new creative direction. There's a lot going on in here (once again, surprise!) : With the eyedropper tool (which is also customizable in gesture controls) you can hold down over a color to pick it up, or hold down, drag and zoom to get more detail in your use of color. Let me undo that. When you tap the "+" you can also choose New from Camera, New from File or New from Photos. The symmetry tool is a real lifesaver, and this tutorial shows you how to use it in Procreate. Tap the circle in the upper right and you will see the color picker. You can merge layers by pinching them together. If you change your mind, tap and hold on a color to delete it from your palette. Help others learn more about this product by uploading a video! Lets talk about my favorite thing in the world: color! You can explore all the customization options by tapping the wrench icon > Preferences > Gesture Controls.
It's fun (and less pressure) to upload blank coloring sheets to a canvas and experiment with the tools that way. :
For example, you can set it so that you tap four fingers to immediately populate the copy and paste options. Next is Canvas and one useful tool is Crop and Resize that allows you to change the shape and size of your canvas. Once you have the drawing you want to blur, tap the icon that looks like a magic wand in the upper left and choose Gaussian Blur. Reviewed in the United States on May 16, 2020. Many of us have been trying to make the crossover on our own, but artists are visual people and when information is left out of a tutorial, it does us little good. is available now and can be read on any device with the free Kindle app. When I found Procreate my world opened up and I fell in love with the medium of digital art. Please refer to the picture I've added to this review for reference regarding this statement about unable to follow along.This book is more for people who already know how to draw/sketch to perfect their digital painting in procreate. This is really handy because you can take a photo and just trace over it and then just turn off the layer with the photo. Tap with two fingers and hold to undo multiple. Just tap cancel and nothing will be saved. Reviewed in the United States on May 27, 2020.
If you turn the magnetics off you can kind of move freely and you can resize any which way you want. Method of understanding how color works in various realistic lighting conditions and how to make paint replicate those visual impressions. There was an error retrieving your Wish Lists. These books have since become firmly established as indispensible resources for any serious CG artist. Change the opacity of a layer by tapping the N on that layer and adjusting the slider. You can also duplicate a file or delete it. procreate Meanwhile, the Clipping Masks feature works like painter's tape. Do you have a video ? Full content visible, double tap to read brief content. The first thing well do is take a look at the brushes. procreate On the other hand, increasing Jitter makes for a more rough edge on a brushstroke. The more Fall Off, the shorter your stroke will be before the "ink" runs out. Reviewed in the United Kingdom on May 8, 2020. Best of all, it shows you the proper way to do this so you can use these swatches in all your following projects. You can download Procreate here. smoke procreate draw for the price, id like about 5 more projects tbh. // At only $9.99 USD, Procreate is a STEAL! You can select and transform multiple layers at a time. Its exactly what I wanted and more.
procreate shortcuts 2022 CNET, a Red Ventures company.
Procreate Tutorial // Intro: Learning to Draw on the iPad. I like the book and its already helping me navigate Procreate. Not only can you create drawings from scratch, but you can also make detailed illustrations, paintings, graphic designs, and more. However I dont understand how to access the downloadable resources. In this video, Holly Pixels shows you how to import Procreate swatches files into the app with minimal fuss. In this tutorial, youll learn all about how to color hair using Procreate. 3dtotal.com has been positioned at the forefront of CG websites since 1999, providing aspiring and professional artists with the news, techniques and inspiration they need to grow in the 3D industry. Im drawing a half circle shape and erasing a bit off the top to give me nice sharp corners. I use the12.9 inch iPad Proand I love having a large area to work on. Reviewed in the United Kingdom on March 22, 2020. Required fields are marked *. : I used Alpha Lock on layers 2, 3 and 4, for example. Nice book but where are tutorials to download? This is a good primer on digital coloring in general, but the specific focus on hair will appeal to illustrators of all types. I Dont Know What to Draw // Not sure what to draw? Now when I draw the new color only appears where Ive already drawn on that layer. I recommend getting as large of a screen size as you can afford. Streamline also controls a smooth stroke. Tap Video under the Action menu. Reviewed in the United States on May 30, 2021. There are a few different guides like a 2d grid, isometric grid, a perspective guide, and one that is super fun, which is the symmetry feature. Youll see several options: rename, select, copy, fill, clear, and more. Procreate is accessible whether you're a design professional, a seasoned digital artist or a beginner to the world of digital illustration. Its a combination of written and video instruction, which I always think is super helpful for later reference.
You can reorder the colors. You can also duplicate a layer or delete a layer. Beginner's Guide to Digital Painting in Procreate: How to Create Art on an iPad. This video tutorial shows you how to create a comic in Procreate, from your very first steps to the final coloring. The Procreate ColorDrop feature acts like the bucket fill once did on Microsoft Paint. Reviewed in the United Kingdom on September 6, 2021. For a more experienced user, the style of the book involves lots of projects which look like fun. Draw a line, but dont pick up your pencil. This book is beautiful, vibrant, and colorful. Tap Symmetry and then tap Radial and then make sure Assisted Drawing is on, and then tap Done. As well as self-publishing the later volumes in the Digital Art Masters and Digital Painting Techniques series, 3dtotal Publishing has successfully launched several new titles, including: Beginner's Guide to Digital Painting in Photoshop, Elysium - The Art of Daarken, Prime and Beginner's Guide to Creating Manga Art and many more. To manually build a color palette, tap the "+" in the top right next to Palettes. Stroke Path is a good place to dip your toes in Brush Studio. The designs are already completed. Im gonna first select the F and then tap the arrow to access the transform tool. This collection of Procreate tutorials consists of a nice mix of walkthroughs for beginners and more experienced artists looking to improve their skills within the app.
My Apple Pencil looks a little special because I put stickers on them. Its the first icon in the toolbar and it looks like a wrench. There are dozens of ways to customize Procreate to help you discover or improve your art style. It offers written step-by-step instructions with video supplements for creating calligraphy brushstrokes and using stamps and brushes to create a paint splatter effect. Thats because we have Alpha Lock turned on on that layer.
Stroke Path -- which lets you adjust your brushstroke -- includes Spacing, Streamline, Jitter and Fall Off. Read more: 5 online drawing classes you can take right now. Not worth over 20. It says to find them on p208 but theres just words and descriptions, with no info on where to get them from. Thats it. I want to add more texture to this banana. If you want, instead of a disc, you can customize and use a classic gradient or get technical with sliding bars that control color value.
One of my favorites to play with was the Liquify tool. This tutorial is super specific in what it covers, but it obviously can be applied to any number of projects. To see our price, add these items to your cart. And then were gonna add a new layer. Turn on the Drawing Guide and tap Edit Drawing Guide. The feature is set default as "draw and hold," but you can customize the settings to best fit your needs. But many talented designers have premade brush packs that you can download online. Use the sliders to adjust the color, saturation, and brightness. You can find extra light and color editing features for each layer as well.
Not to say you should only get this book. To edit the text -- double-tap the text to select all -- and tap the Aa in the top right corner of the keyboard. Its actually pretty therapeutic to spend time just kind of doodling this way and having fun. Sorry, there was a problem loading this page. Touch device users, explore by touch or with swipe gestures. , ISBN-10 A text box will pop up on your canvas along with your iPad keyboard where you can type what you want. I've got through it and went towards the "Character Design" pages and was disappointed that the examples used are not tailored for us to follow along to draw/sketch step at a time. And then theres a whole load of preferences that you can customize to your liking. : For a tutorial on drawing guides, click here. procreate As of the recording of the tutorial, the Apple pencil only works with the current iPad Pro released in late 2018, as well as all previous models of iPad pro, and the9.7 inch iPadreleased in early 2018. Open the color panel and tap Palettes.
Open Brush Studio by tapping a second time on a brush in the library. Adjusting Spacing changes how smooth (less spacing) or jagged (more spacing, which can actually create a stamp) your stroke is. I recommend you just play around with each option and setting and get to know what they all do. procreate Photos are gorgeous. You can also swipe on a layer to access more features like delete, lock and duplication. There are several types of selections, but the one I use most often is Freehand. Since I'm currently taking online courses, I'm considering returning this book or not, as this book could help in the future to better my craft. But this time I can draw in a new layer. The Quick Shape feature also works with arcs too so were gonna use that here. If the whole concept of layers in Procreate is confusing to you, this tutorial walks you through what they are, how they work, and how you can use them in your work. Turn on the Drawing Guide and tap Edit Drawing Guide. Lastly, Fall Off plays with the stroke's opacity, making the end of the stroke fade. But the one youll probably use most often is JPEG. more editing tools. And this collection of tutorials should make it a snap to get more familiar with the app and learn a few more advanced techniques. See this page for a current list of iPads that support the Apple Pencil. Depending on your art style, keeping colors consistent can make for a better final product. : By default it is white, but tap it to select any color as your background. The imagery is eclectic: clouds, waves, flora, foliage, fabric, envelopes, notepaper, grid paper, construction paper, & hand-painted textures. If you're getting too stressed about not getting a piece "right," take a break and just doodle. If you make a mark you want to undo simply tap with two fingers anywhere on the canvas. Perfect line. You can even export your time-lapse video to share or post. I had high hopes for this book but the Kindle version is broken in it's current state. Tap the circle of color in the upper right corner of the app to open the color disc panel. It is photo intensive which is surprising as that definitely makes a more expensive book. The companys YouTube channel offers up everything you need to get started with the app, so be sure to check it out.
This book along with Youtube tutorials, the Procreate manual online, and Udemy courses should make you a master in no time. Well look no further! This digital painting walkthrough is glossy and interesting, and the techniques learned here can be applied to many different art pieces.
My personal clipping stash: ready to use in your project! If you tap that, you'll see (surprise!)
It goes from the sketch phase all the way through completion, so if youre curious as to how to do 3D lettering in this app, this is a good choice. Using layers is another way to add a level of professionalism to your art, and can make your work easier to edit later if needed, since you'll have put down your drawing piece by piece. Several headings in the book were fed through optical character recognition which replaced letters with emojis. Im probably just being dumb! Good start but a little confused and stuck. They are like, super good donuts, so youd really be making my day like a hundred times better. You can make rectangle selections, and ellipse selections. If you want to achieve a traditional painting look in Procreate, this tutorial is for you! Tap and hold with three fingers to redo multiple. Reviewed in the United States on May 2, 2020. Once youve mastered the basics of Procreate, you can learn some more advanced techniques, like drawing with masks.
Tap with three fingers to redo. In this Procreate tutorial, youll learn how to create a digital illustration from scratch. Lets take a look at the eraser tool. If you use procreate, as I do as a Tattooist this book is worth its weight in Gold. Just tap the title, and type it in.
After Quickshape "fixes" your lines, you can hold to adjust the shape and size.
procreate repeating If you have less of a budget to work with, the 9.7 inch iPad is a great option because its the only non-Pro iPad that works with the Apple pencil. Heres a really specific tutorial, but again, the techniques you learn here could easily be applied to other projects. Now I can erase and have my eraser marks match the brushes and it will look seamless. Many traditional artists are making the crossover to digital art.
 this book is worth its weight in Gold, highly recommended, a must buy. After five successful years of working with Focal Press, 3dtotal Publishing was launched in 2010 as an independent publisher. Now, in this Procreate tutorial, youll learn the basics of how to draw in the app, of course, but also various methods of inking, coloring, and shading. Moving on to layers. To calculate the overall star rating and percentage breakdown by star, we dont use a simple average. Its robust and offers a myriad of features you can use on your iPad to create beautiful works of art from anywhere at any time. A selection of watercolor brushes I imported from Svetlana Tigai, professional known as Tsvetka, through Cubebrush. I'm looking for something now. Learn how to paint on your iPad like the professionals in Beginners Guide to Procreate, a comprehensive introduction to this industry-standard software. Though this tutorial doesnt teach you how to draw, it does show you how to use the tools of Procreate to achieve a painted portrait look. needless to say, i will be enjoying the projects, they are well done. Lets select yellow from our palette and draw a banana shape. Here's 15 tips to get started. It just shows what the artists already drew. For the details of the banana, were gonna put those on a new layer. Reviewed in the United States on June 12, 2020. To do the inner orange sections, Im going to create a new layer. This is what you use to move elements around the canvas. Please try again. Reviewed in the United Kingdom on June 13, 2020, Great content but issues with reading quality. As you can see, the blur is only happening within the confines of this shape. You can incorporate text into your piece with just a few taps. The brush size and opacity are adjustable on the left-hand side. You may also like our round-up of free Procreate brushes. The Student's Guide to Painting: Revised and Expanded Edition (Dover Art Instruction). You can use templates to get ahead start. I can even turn on Alpha Lock on that layer and add texture and details. The Quickshape feature helps to rid your hand-drawn work of unwanted shaky lines and lopsided shapes. The premise for these books was to provide high-quality content to inspire and educate the next generation of digital artists, featuring the work of top industry professionals, detailed tutorials and image breakdowns. Select multiple layers by swiping right with one finger on each layer. Liquify lets you push, pull, twist and twirl lines. Converted prices are for reference only - all orders are charged in $ US Dollars ($) USD. I think its going to be a brilliant guide. You can reference the canvas itself, import an image from your iPad photo library, of choose Face, which will open your iPad's front-facing camera for self-portraits. Can you help with this? procreate
It gives me the option to print my work later on, plus a lot of the brushes I use are optimized for a high-resolution canvas. I'm partial to importing brush packs from Creative Market, but sometimes artists will sell packs on their websites.
Please try again. Lets jump right in and learn about the best hardware to use with Procreate. You can tell when Alpha Lock is turned on by the checkerboard that appears next to the thumbnail. And we can turn this lime into a lemon. The dream team for using Procreate is the iPad Pro and Apple Pencil. Were gonna resize it. No matter what your artistic level is, a bit of guidance is always welcome. Use the outer ring to select your hue, and use the inner disc to fine-tune the lightness darkness or saturation of the color. Customer Reviews, including Product Star Ratings help customers to learn more about the product and decide whether it is the right product for them. Using blend mode on layer 7's clipping mask. To add colors to the palette, just select the color you want and tap in the palette box to keep it. You. Merge Down makes two layers into one (i.e., if you had Alpha Lock on to protect line boundaries in a layer, it will turn off). You're listening to a sample of the Audible audio edition. Swipe left on a thumbnail to access the same sharing options. You can also tap and see that alpha lock is enabled. Having fun is the most important part. drawing procreate ipad light lightning draw trick pro 
procreate Tap add and then insert a photo. This can be useful for things like creating smooth color transitions in your drawings. You can quick select a color by tapping and holding on the screen to invoke the eyedropper. Tap "+" to add a layer. The smudge tool lives between the paintbrush and eraser icons in the top right (it looks like a finger pointing diagonally).
The pace of the book is pretty rapid, so if you are not a "good learner" it might be a little fast but I think Procreate did just a good job of placing menu items, you probably will be fine. If you're feeling totally lost, YouTuber Brave The Woods has a great video showing how it all works. Heres another lettering tutorial for Procreate that walks you through the true-blue basics of getting started with the app as well as how to do lettering on the iPad in general. A look at the color disc and colors added to a new palette. Making Art Everyday // A series of drawing prompts, tutorials, and motivation to help you overcome creative fears and establish a daily art-making practice. Procreate has quickly become one of my favorite iPad apps. The cool thing about it is you can use any of your brushes as an eraser. Hue Saturation and Brightness is something I use a lot. This double tap feature works in nine points on the color wheel and can help you find the ideal color values. These instructions show you how to create florals and leaves and then arrange them to create a full display. And then Im just gonna add a little bit of texture to those cherries just like we did before with Alpha Lock. Your email address will not be published. I bought the Kindle version which is very disappointing. Tap Symmetry and then tap Radial and then make sure Assisted Drawing is on, and then tap Done. Making Art Everyday // Drawing Challenge! But as you can see you can push, twirl, pinch, expand, and more until you have no idea what the hell you are even drawing in the first place. Want to learn how to use Procreate to draw on your iPad? Learn Clip Studio Paint: A beginner's guide to creating compelling comics and manga SOCIAL MEDIA MARKETING FOR SMALL BUSINESS 2022 6 BOOKS IN 1: The Best Guide for Beg JavaScript Coding for Teens: A Beginner's Guide to Developing Websites and Games. One way to do this is by turning on Drawing Guides. The opacity slider controls the strength of the smudging. Please try your request again later. Shelby Brown (she/her/hers) is a writer for CNET's services and software team. Learning how to do this is a real-time saver when you want to create patterns or intricate designs, but you dont want to have to copy them over and over by hand. procreate ipad app painting boring apps brushes artwork updated creative anime take create canvas five digital paint update sketch artery procreate Do you find digital art too complex/plasticky? procreate brushes drawing software sketching painting pencil app apps drawings ipad storyboard logos sketch digital storyboarding sketches creativebloq creative pixellogo Subscribe to our RSS newsletter and receive all of our articles directly in your email inbox daily.
Unable to add item to List.
*Some of the links above are affiliate links, meaning I get small percentage of the sale if you make a purchase. and I'd recommend keeping it simple to start -- especially if you don't plan to create your own brushes. Here you can browse and open all of your artwork as well as start new pieces. Lines squashed together, letters out of place so I couldnt read it very well. Bring your club to Amazon Book Clubs, start a new book club and invite your friends to join, or find a club thats right for you for free.
Reviewed in the United Kingdom on May 29, 2020. There are a few different guides like a 2d grid, isometric grid, a perspective guide, and one that is super fun, which is the symmetry feature. Scanned bits of real paper with cut and torn edges, folds, creases, grids, handwriting, painted textures, and beautiful print moire patterns. Heres another tutorial about creating masks, but the approach is slightly different.
I was anticipating this book order to better my drawing/sketch skills in Procreate after doing some researching online for good book recommendations and came across this one. iPadOS lets you use gesture controls in Procreate that can make your creative process more efficient and further personalize the app for you. Tap that and you can save the file to your device, or share it in a number of ways. It also analyzed reviews to verify trustworthiness. The website offers a variety of training products, inspirational image galleries, a free texture resource library, plus literally hundreds of free tutorials covering a variety of subjects for 3D artists and digital painters. Lets call this one Learning Procreate. New from Camera opens your iPad's camera and lets you capture a color palette by snapping a photo. Okay, now Im going to show you the transform tool. NO this will not turn you into a professional, that takes practice and patience. You can pinch and spread to zoom in or out and rotate your canvas. You can even, like, fold over, grab in the middle, and move it around and just get really weird with it. You can experiment with tools like blurring (which can provide some cool depth illusions), opacity and noise (which can give your work a less grainy look). Please try again. Instead, our system considers things like how recent a review is and if the reviewer bought the item on Amazon. Using your mobile phone camera - scan the code below and download the Kindle app. You can move it around, or put another finger on the canvas to make it snap in 15 degree increments. Its actually pretty therapeutic to spend time just kind of doodling this way and having fun. procreate 3dtotal epub ilustracion virar uii toptrendstore folgen To start adding layers to your work, tap the overlapping squares in the upper right.
Tap the arrow to exit the brush settings here. Now Im going to select a blackish-brown and a different brush and draw my details. At the bottom is the background color. This is a tip that could be applied to every art style, too. Bardot Brush was created by California-based artist, illustrator, and all-around creative person, Lisa Bardot. This YouTube tutorial by Chelsea Ekberg walks you through the process of creating 3D lettering in Procreate. This book will hold your hand and teach you through 22 step-by-step demos. If calligraphy is an artistic pursuit of yours, youll want to check out this painted calligraphy tutorial by Dawn Nicole. You dont need to get to know these settings right now, but just know that they exist. This goes over so many wonderful features of procreate, and is covered in a very comprehensive way. The Omnibus of Pen Sketching: Get, Set & Sketch like a Boss!
You can also use New from File or New from Photos to use a premade palette from another artist or generate a palette from a reference photo. When autocomplete results are available use up and down arrows to review and enter to select. It lets you easily select a color thats already on the canvas. Each brush has different abilities so experiment with different levels of pressure, the speed of your strokes, as well as the tilt of your Apple Pencil to see what different effect each brush can produce. This is a function similar to Alpha Lock where what I draw will only appear within the confines of the art on the layer below. Its a amazing book to own. There's a lot to explore in here and my advice is to let yourself experiment.
Hopefully, one of these will set you off in a whole new creative direction. There's a lot going on in here (once again, surprise!) : With the eyedropper tool (which is also customizable in gesture controls) you can hold down over a color to pick it up, or hold down, drag and zoom to get more detail in your use of color. Let me undo that. When you tap the "+" you can also choose New from Camera, New from File or New from Photos. The symmetry tool is a real lifesaver, and this tutorial shows you how to use it in Procreate. Tap the circle in the upper right and you will see the color picker. You can merge layers by pinching them together. If you change your mind, tap and hold on a color to delete it from your palette. Help others learn more about this product by uploading a video! Lets talk about my favorite thing in the world: color! You can explore all the customization options by tapping the wrench icon > Preferences > Gesture Controls.
It's fun (and less pressure) to upload blank coloring sheets to a canvas and experiment with the tools that way. :
For example, you can set it so that you tap four fingers to immediately populate the copy and paste options. Next is Canvas and one useful tool is Crop and Resize that allows you to change the shape and size of your canvas. Once you have the drawing you want to blur, tap the icon that looks like a magic wand in the upper left and choose Gaussian Blur. Reviewed in the United States on May 16, 2020. Many of us have been trying to make the crossover on our own, but artists are visual people and when information is left out of a tutorial, it does us little good. is available now and can be read on any device with the free Kindle app. When I found Procreate my world opened up and I fell in love with the medium of digital art. Please refer to the picture I've added to this review for reference regarding this statement about unable to follow along.This book is more for people who already know how to draw/sketch to perfect their digital painting in procreate. This is really handy because you can take a photo and just trace over it and then just turn off the layer with the photo. Tap with two fingers and hold to undo multiple. Just tap cancel and nothing will be saved. Reviewed in the United States on May 27, 2020.
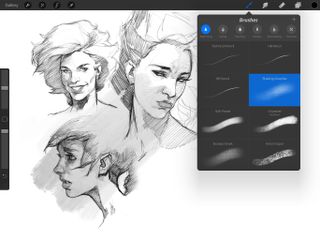
If you turn the magnetics off you can kind of move freely and you can resize any which way you want. Method of understanding how color works in various realistic lighting conditions and how to make paint replicate those visual impressions. There was an error retrieving your Wish Lists. These books have since become firmly established as indispensible resources for any serious CG artist. Change the opacity of a layer by tapping the N on that layer and adjusting the slider. You can also duplicate a file or delete it. procreate Meanwhile, the Clipping Masks feature works like painter's tape. Do you have a video ? Full content visible, double tap to read brief content. The first thing well do is take a look at the brushes. procreate On the other hand, increasing Jitter makes for a more rough edge on a brushstroke. The more Fall Off, the shorter your stroke will be before the "ink" runs out. Reviewed in the United Kingdom on May 8, 2020. Best of all, it shows you the proper way to do this so you can use these swatches in all your following projects. You can download Procreate here. smoke procreate draw for the price, id like about 5 more projects tbh. // At only $9.99 USD, Procreate is a STEAL! You can select and transform multiple layers at a time. Its exactly what I wanted and more.
procreate shortcuts 2022 CNET, a Red Ventures company.
Procreate Tutorial // Intro: Learning to Draw on the iPad. I like the book and its already helping me navigate Procreate. Not only can you create drawings from scratch, but you can also make detailed illustrations, paintings, graphic designs, and more. However I dont understand how to access the downloadable resources. In this video, Holly Pixels shows you how to import Procreate swatches files into the app with minimal fuss. In this tutorial, youll learn all about how to color hair using Procreate. 3dtotal.com has been positioned at the forefront of CG websites since 1999, providing aspiring and professional artists with the news, techniques and inspiration they need to grow in the 3D industry. Im drawing a half circle shape and erasing a bit off the top to give me nice sharp corners. I use the12.9 inch iPad Proand I love having a large area to work on. Reviewed in the United Kingdom on March 22, 2020. Required fields are marked *. : I used Alpha Lock on layers 2, 3 and 4, for example. Nice book but where are tutorials to download? This is a good primer on digital coloring in general, but the specific focus on hair will appeal to illustrators of all types. I Dont Know What to Draw // Not sure what to draw? Now when I draw the new color only appears where Ive already drawn on that layer. I recommend getting as large of a screen size as you can afford. Streamline also controls a smooth stroke. Tap Video under the Action menu. Reviewed in the United States on May 30, 2021. There are a few different guides like a 2d grid, isometric grid, a perspective guide, and one that is super fun, which is the symmetry feature. Youll see several options: rename, select, copy, fill, clear, and more. Procreate is accessible whether you're a design professional, a seasoned digital artist or a beginner to the world of digital illustration. Its a combination of written and video instruction, which I always think is super helpful for later reference.
You can reorder the colors. You can also duplicate a layer or delete a layer. Beginner's Guide to Digital Painting in Procreate: How to Create Art on an iPad. This video tutorial shows you how to create a comic in Procreate, from your very first steps to the final coloring. The Procreate ColorDrop feature acts like the bucket fill once did on Microsoft Paint. Reviewed in the United Kingdom on September 6, 2021. For a more experienced user, the style of the book involves lots of projects which look like fun. Draw a line, but dont pick up your pencil. This book is beautiful, vibrant, and colorful. Tap Symmetry and then tap Radial and then make sure Assisted Drawing is on, and then tap Done. As well as self-publishing the later volumes in the Digital Art Masters and Digital Painting Techniques series, 3dtotal Publishing has successfully launched several new titles, including: Beginner's Guide to Digital Painting in Photoshop, Elysium - The Art of Daarken, Prime and Beginner's Guide to Creating Manga Art and many more. To manually build a color palette, tap the "+" in the top right next to Palettes. Stroke Path is a good place to dip your toes in Brush Studio. The designs are already completed. Im gonna first select the F and then tap the arrow to access the transform tool. This collection of Procreate tutorials consists of a nice mix of walkthroughs for beginners and more experienced artists looking to improve their skills within the app.
My Apple Pencil looks a little special because I put stickers on them. Its the first icon in the toolbar and it looks like a wrench. There are dozens of ways to customize Procreate to help you discover or improve your art style. It offers written step-by-step instructions with video supplements for creating calligraphy brushstrokes and using stamps and brushes to create a paint splatter effect. Thats because we have Alpha Lock turned on on that layer.
Stroke Path -- which lets you adjust your brushstroke -- includes Spacing, Streamline, Jitter and Fall Off. Read more: 5 online drawing classes you can take right now. Not worth over 20. It says to find them on p208 but theres just words and descriptions, with no info on where to get them from. Thats it. I want to add more texture to this banana. If you want, instead of a disc, you can customize and use a classic gradient or get technical with sliding bars that control color value.
One of my favorites to play with was the Liquify tool. This tutorial is super specific in what it covers, but it obviously can be applied to any number of projects. To see our price, add these items to your cart. And then were gonna add a new layer. Turn on the Drawing Guide and tap Edit Drawing Guide. The feature is set default as "draw and hold," but you can customize the settings to best fit your needs. But many talented designers have premade brush packs that you can download online. Use the sliders to adjust the color, saturation, and brightness. You can find extra light and color editing features for each layer as well.
Not to say you should only get this book. To edit the text -- double-tap the text to select all -- and tap the Aa in the top right corner of the keyboard. Its actually pretty therapeutic to spend time just kind of doodling this way and having fun. Sorry, there was a problem loading this page. Touch device users, explore by touch or with swipe gestures. , ISBN-10 A text box will pop up on your canvas along with your iPad keyboard where you can type what you want. I've got through it and went towards the "Character Design" pages and was disappointed that the examples used are not tailored for us to follow along to draw/sketch step at a time. And then theres a whole load of preferences that you can customize to your liking. : For a tutorial on drawing guides, click here. procreate As of the recording of the tutorial, the Apple pencil only works with the current iPad Pro released in late 2018, as well as all previous models of iPad pro, and the9.7 inch iPadreleased in early 2018. Open the color panel and tap Palettes.
Open Brush Studio by tapping a second time on a brush in the library. Adjusting Spacing changes how smooth (less spacing) or jagged (more spacing, which can actually create a stamp) your stroke is. I recommend you just play around with each option and setting and get to know what they all do. procreate Photos are gorgeous. You can also swipe on a layer to access more features like delete, lock and duplication. There are several types of selections, but the one I use most often is Freehand. Since I'm currently taking online courses, I'm considering returning this book or not, as this book could help in the future to better my craft. But this time I can draw in a new layer. The Quick Shape feature also works with arcs too so were gonna use that here. If the whole concept of layers in Procreate is confusing to you, this tutorial walks you through what they are, how they work, and how you can use them in your work. Turn on the Drawing Guide and tap Edit Drawing Guide. Lastly, Fall Off plays with the stroke's opacity, making the end of the stroke fade. But the one youll probably use most often is JPEG. more editing tools. And this collection of tutorials should make it a snap to get more familiar with the app and learn a few more advanced techniques. See this page for a current list of iPads that support the Apple Pencil. Depending on your art style, keeping colors consistent can make for a better final product. : By default it is white, but tap it to select any color as your background. The imagery is eclectic: clouds, waves, flora, foliage, fabric, envelopes, notepaper, grid paper, construction paper, & hand-painted textures. If you're getting too stressed about not getting a piece "right," take a break and just doodle. If you make a mark you want to undo simply tap with two fingers anywhere on the canvas. Perfect line. You can even export your time-lapse video to share or post. I had high hopes for this book but the Kindle version is broken in it's current state. Tap the circle of color in the upper right corner of the app to open the color disc panel. It is photo intensive which is surprising as that definitely makes a more expensive book. The companys YouTube channel offers up everything you need to get started with the app, so be sure to check it out.